Unlocking Aftermath (2/2)
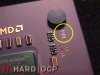
Posted by Wesley on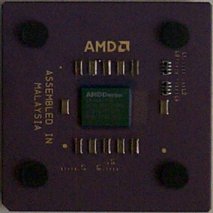 | Remember this chip from my previous article? This is a Duron 650MHz. I chose Duron over Thunderbird because of overclockability. The high quality of the AMD chips ensure a fair amount of overclocking already, but Duron's default voltage is 1.5V as opposed to Thunderbird's 1.7V. Since the maximum voltage setting for Socket A is generally 1.85V, Duron has better headroom for overclocking as higher voltage generally helps the chip operating in higher speed provided that a suitable cooling solution is present. Many hardware sites have confirmed that this voltage headroom does indeed help Duron become a good overclocking chip, getting more than 200MHz faster speed in most cases. |
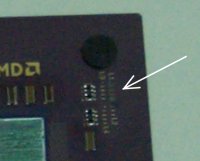
Duron's average speed is only about one speed grade (50MHz) lower than Thunderbird and depending on the applications Durons and Thunderbirds perform pretty much the same. Hearing about the overclockability of Duron, I concluded that I had little to lose in performance and a lot to gain from overclocking, saving money in the end. I looked for the local availability of Duron and 650MHz was the only choice. I bought it, only to discover its locked state. That didn't matter for too long, as I was able to unlock it anyway. Now I just needed to see how far the chip would go...
| CPU: | AMD Duron 650MHz |
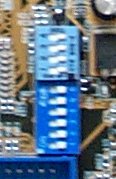
| M/B: | Asus A7V (KT-133 Chipset) |
| Cooling: | Alpha PAL6035MUC Fan/Heatsink |
| RAM: | 128MB x 2 Hyundai PC-133 SDRAM |
| Video: | SUMA GeForce2 GTS 32MB |
| OS: | Windows 2000 SP1 |
| Else: | Classified ^_^ |
| Speed | Config | Voltage | Status |
|---|---|---|---|
| 650MHz | 100 x 6.5 | 1.50V | Perfect |
| 700MHz | 100 x 7.0 | 1.50V | Perfect |
| 735MHz | 113 x 6.5 | 1.50V | Good |
| 750MHz | 100 x 7.5 | 1.50V | Boot Stop |
| 800MHz | 100 x 8.0 | 1.50V | POST Stop |
| 800MHz | 100 x 8.0 | 1.70V | Perfect |
| 850MHz | 100 x 8.5 | 1.80V | Perfect |
| 1000MHz | 100 x 10.0 | 1.85V | No POST |
| 950MHz | 100 x 9.5 | 1.85V | POST Stop |
| 900MHz | 100 x 9.0 | 1.85V | Good |
| 910MHz | 107 x 8.5 | 1.85V | Good |
| 892MHz | 105 x 8.5 | 1.80V | Boot Stop |
| 892MHz | 105 x 8.5 | 1.85V | Perfect |
Perfect = No Crashes Whatsoever
Good = Benchmark Crashes and Freezes Occasionally on Normal Use
Boot Stop = Computer Crashes During Boot or Immediately After Boot
POST Stop = Computer Crashes Before POST finishes
No POST = Cannot Boot At All
As you can notice up there, I had 1 GHz mark in my mind. Unfortunately, my chip wasn't able to break that. 900MHz was not as stable as I wanted either. But at 892MHz, with the maximum voltage possible, it was as stable as the initial 650MHz speed due to good cooling provided by Alpha fan/heatsink combo. After further analysis, speed of up to 935MHz would have been possible with 1.90V setting. But 1.85V of 892MHz setting is scary enough anyways, so I decided not to hack the voltage controls. Now for some benchmarks.
| Benchmark | 650MHz | 892MHz | Change | |
|---|---|---|---|---|
| d.net client | RC5 Long, core#6 (MKeys/s) | 2.230 | 3.083 | +38.3% |
| Sandra 2000 7.6.49 | Dhrystone (MIPS) | 1855 | 2545 | +37.2% |
| Whetstone (MFLOPS) | 876 | 1241 | +41.7% | |
| MMX (it/s) | 2150 | 2960 | +37.7% | |
| 3DNow! (it/s) | 2751 | 3781 | +37.4% | |
| Memory ALU (MB/s) | 423 | 442 | +4.5% | |
| Memory FPU (MB/s) | 531 | 553 | +4.1% | |
As expected, synthetic benchmarks reflect the exact increases in clock speed as well as the FSB. Mathematical increase of clock speed from 650MHz to 892.5MHz is 37.3% and most of the results mirror this within margin of error. As for the memory categories, speed increase of 5% in memory from increasing FSB was mirrored in the results as well.
If you're into RC5 code cracking with distributed.net client like me(or my team), you can see that you'll get a very efficient cracking machine (over 3 million keys cracked in a second!) without big investment when you buy a Duron system.

| Benchmark | 650MHz | 892MHz | Change | |
|---|---|---|---|---|
| 3DMark 2000 | Overall (1024x768 16bit) | 3975 | 4665 | +17.4% |
| Quake3 Arena v1.11 (fps) | 640x480 HQ | 98.5 | 116.2 | +18.0% |
| 800x600 HQ | 96.1 | 110.7 | +15.2% | |
| 1024x768 HQ | 83.0 | 86.3 | +4.0% | |
| 1280x1024 HQ | 50.0 | 50.2 | +0.4% | |
| 1600x1200 HQ | 33.4 | 33.4 | 0.0% | |
Overclocking to 892MHz also brought up the scores and frame rates nicely. The memory bandwidth becomes a big problem for resolutions equal to or higher than 1024x768, so high resolutions don't benefit much from CPU overclocking, but it does help a lot in lower resolutions.
If you've run 3DMark 2000 on your own a lot, you'll notice that the score is quite low for a 900~MHz CPU with GeForce2 GTS. I think this is generally because 3DMark runs slower in Windows 2000 than in Windows 98, but examining details revealed that something else may be holding back the score. Nevertheless, it did effectively show how the overclocking helped increase the score.
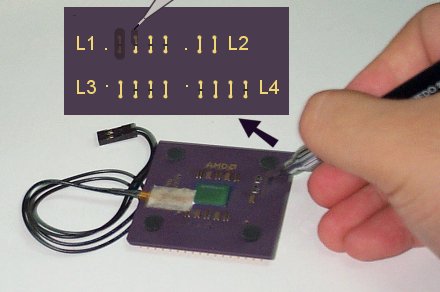
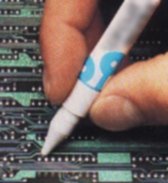
What a difference a pencil makes.
By unlocking the CPU that was destined to run only at around 650MHz, I could get a noteworthy performance increase out of it at virtually no cost. A lot of heat was generated while operating at 892MHz, but Alpha PAL6035 was good enough to lower the temperature to acceptable level. You should also note Duron's high overclockability - rock-stable while running at more than 37% the original speed. While it fell a little short of the magical 50% overclock achieved by the legenday Celeron 300A or more recently, Celeron 566, I do not doubt that it would certainly compete well in the overclocked performance arena with its Intel counterpart, 'Celemine(FC-PGA Celeron)'. Now I need to get some sleep...