Today’s “The Toon-Box”
Posted by Wesley on

| PID # | Description | Unit |
|---|---|---|
| 010D | Vehicle speed | km/h |
| 0121 | Distance driven with CEL (Check Engine Light) on | km |
| 0130 | Warm-ups since TC (Trouble Code) was cleared | Count |
| 0131 | Distance driven since TC was cleared | km |
| 0142 | ECM (Engine Control Module) 12V Battery Voltage | V |
| 0146 | Ambient Air Temperature | °C |
| 0149 | Accelerator Pedal Position 1 | % |
| PID # | Description | Unit | Formula |
|---|---|---|---|
| 228334 | State of Charge (Displayed) | % | A × 100 / 255 + 0 |
| 015B | State of Charge (Raw) | % | A × 100 / 255 + 0 |
| 2241A3 | Battery Capacity (for 2017-18 Bolt) | kWh | A × 999 / 31250 + 0 |
| 22434F | Battery Temperature | °C | A × 1 / 1 - 40 |
| 22436B | HV Charger Voltage | V | A × 1 / 2 + 0 |
| 22436C | HV Charger Current | A | A × 1 / 20 + 0 |
| 22437D | Last Charge Amount | kWh | A × 1 / 100 + 0 |
| 2241B6 | Battery Heater Power | kW | A × 1 / 1000 + 0 |
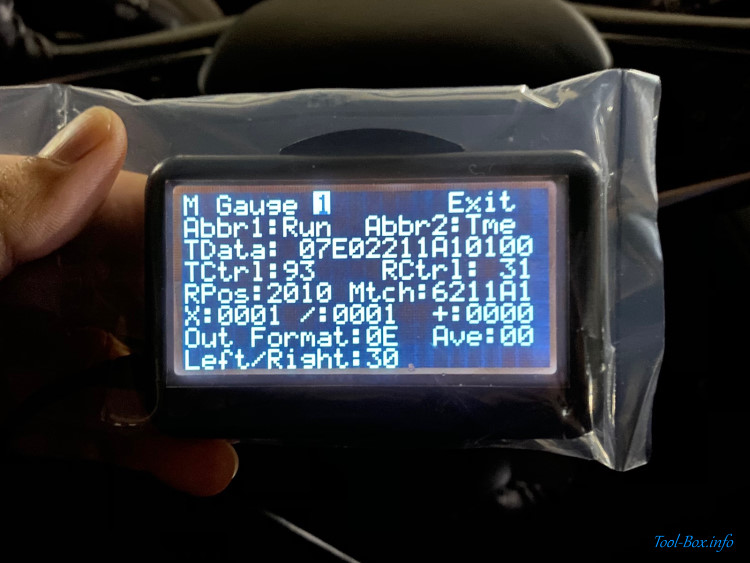
| # | Abbr1 | Abbr2 | TData | TCtrl | RCtrl | RPos | Mtch | X | / | + | Out | Ave | L/R |
|---|---|---|---|---|---|---|---|---|---|---|---|---|---|
| 1 | SoC | D % | 07E4228334 | 93 | 31 | 2008 | 628334 | 0064 | 00FF | 0000 | 00 | 00 | 32 |
| 2 | SoC | R % | 07E0015B | 92 | 21 | 1808 | 415B | 0064 | 00FF | 0000 | 00 | 00 | 32 |
| 3 | Cap | kWh | 07E42241A3 | 93 | 31 | 2010 | 6241A3 | 03E7 | 7A12 | 0000 | 00 | 00 | 22 |
| 4 | Bat | °C | 07E422434F | 93 | 31 | 2008 | 62434F | 0001 | 0001 | FFD8 | 00 | 00 | 30 |
| 5 | Chg | hvV | 07E422436B | 93 | 31 | 2010 | 62436B | 0001 | 0002 | 0000 | 00 | 00 | 32 |
| 6 | Chg | hvA | 07E422436C | 93 | 31 | 2010 | 62436C | 0001 | 0014 | 0000 | 00 | 00 | 32 |
| 7 | Chg | kWh | 07E422437D | 93 | 31 | 2010 | 62437D | 0001 | 0064 | 0000 | 00 | 00 | 22 |
| 8 | BHt | kW | 07E42241B6 | 93 | 31 | 2010 | 6241B6 | 0001 | 03E8 | 0000 | 00 | 00 | 13 |