SKT Smart Home: making of a motion sensor
Posted by Wesley on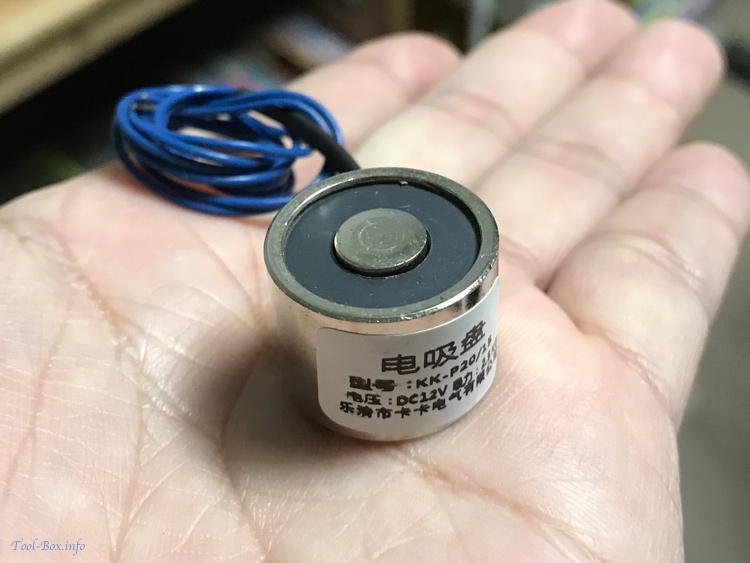
Small lifting electromagnet
SK Telecom's Smart Home device line-up was conspicuously missing a motion sensor. It would have nicely complemented the Jikimi home security devices. Considering that the PIR (passive infrared) sensor itself doesn't cost all that much (some as low as US$2) or complicated to work with, it wouldn't have been so hard to create a product out of it.
It turned out that SKT wanted that as a part of a much more beefed up home security solution called "T View Sense" that came out last month. It's a cloud-connected IP camera with the optional sensor package (motion, door, temperature/humidity, smoke, and carbon monoxide). The sensors requires the IP camera to function because they communicate to the server via the camera's integrated gateway. I appreciate the effort SKT is finally making to counter the IP camera efforts from the other mobile carriers (LGU+ had theirs since 2013), but the pricy nature of the camera (official price of KRW159,000 or about US$140) is off-putting to someone who's just interested the sensor alone.
So I decided to be a bit creative and repurpose one of the existing Jikimi devices into a motion sensor instead. Initially, I wanted to modify the SOS button because it was cheaper. But the fact that the alarm it makes doesn't get differentiated between the buttons made it a deal-breaker. With the door sensor, I needed to simulate the door closing/opening with a magnet, meaning that I could either attach the included magnet to a motor or use an electromagnet to fake such action.

Getting the door sensor to sense the electromagnet
Obviously, I chose the electromagnet because it would be far more simpler if it worked. If it generated enough magnetic field, it would act like the original magnet and cause the sensor to send a "door closed" signal. The problem was that I wasn't sure what kind or how big of an electromagnet would be necessary. After looking at various offerings on the internet, I decided to take a stab in the dark and buy a small "lifting electromagnet" used in machines for picking up metallic items. The particular model I bought for about US$5 was rated for 2.5kg at 12V DC, consuming 3W. The model number KK-P20/15 apparently indicates a 20mm outer diameter and 15mm thickness.
12V was tad higher than what I wanted, but the electromagnet works at a lower voltage with reduced pulling power. All I needed to know was whether that pull is just enough to trick the sensor, so I created a quick testing platform with my kids' electric circuit kit. As you can see here, 3V was just barely good enough for the sensor to activate. At 6V, it worked more reliably. This confirmed two things - the electromagnet I had was fit for the job and that I could make it work with a battery pack, e.g. single-cell Li-Ion battery (3.7V nominal).

PIR motion sensor switch and the USB power cable
For the next step, I needed a motion sensor that activates the electromagnet. To keep things simple, I went with a sensor-switch combo (model SZH-LC035, about US$6; TDL-2023 is similar) that allows the input power in the range of 5 to 24V to pass through while the motion is detected. When motion is detected within the 5-meter range, it'll turn on for about 10 seconds, but that will extend up to 10 minutes as long as there's still motion.
Because this switch needed a minimum of 5V to operate, I decided to use the USB port to power the whole thing. I bought a USB power cable that plugs into the input end of the switch and an open-wire cable that plugs into the output end. The latter was to be connected to the electromagnet. When they are all put together, the USB port will provide power to the switch, which will turn on and activate the electromagnet with motion. Ultimately, this will trigger the "door closed" state on the door sensor and I will get notified of the motion on my smartphone.
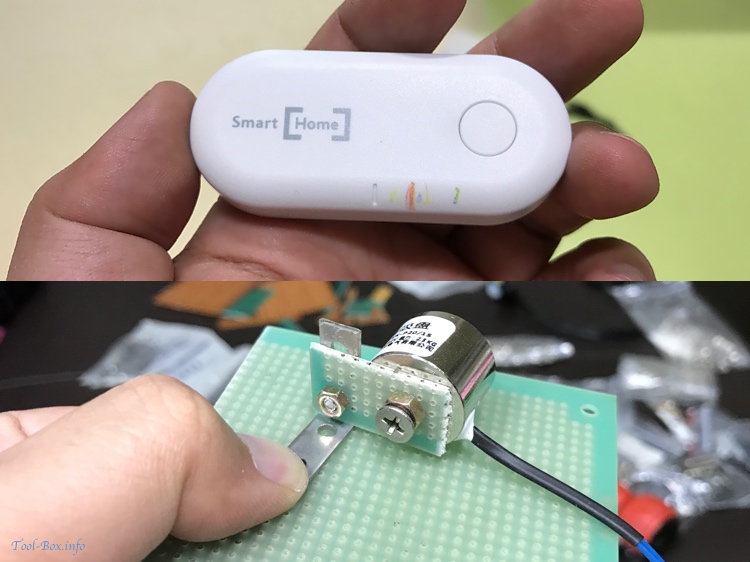
Marking the sensitive area on the sensor and installing the electromagnet to the board
After verifying that the individual steps were working as intended, I started putting the components into a compact package on a square breadboard. I first marked the location on the door sensor where it was most sensitive to the electromagnet to help with the positioning. I then pulled out some corner braces, bolt & nuts, and bits of cut up breadboard from my toolbox to affix the components into place.
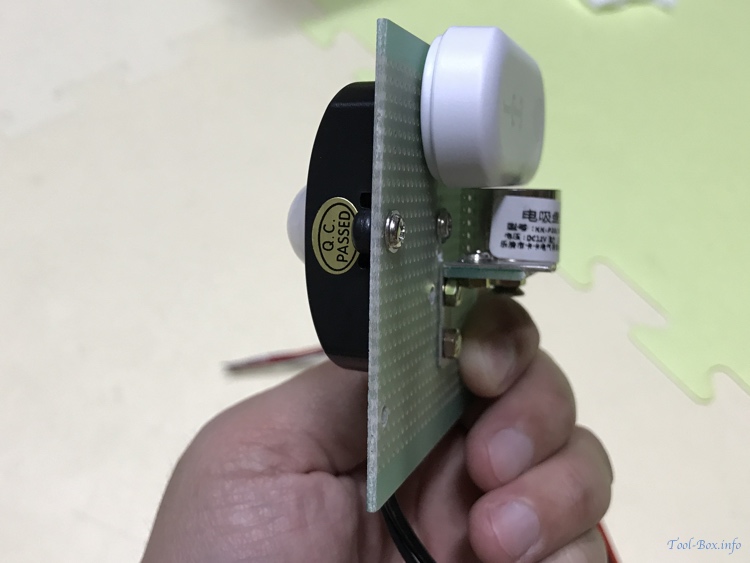
Motion sensor, door sensor, and the electromagnet all in place
Initially, I placed all the components on the same side. But testing in a dark room revealed a problem stemming from the door sensor's blue LED briefly lighting up with the change of state. As the electromagnet is turned off after the motion sensor becomes idle, the door sensor's state turns into "open" and the LED flashes. This is recognized by the motion sensor, so it turns the electromagnet back on. The door sensor enters "closed" state again. The whole process repeats continuously until I manually cut off the power.
The solution was to move the motion sensor to the other side of the board, so that it wouldn't notice the LED flashing. Testing under this configuration verified that the LED no longer interfered with the motion sensor, so I went on to tidying up the wires to finish the assembly.
The motion sensor assembly in front
As you can see here, the final design shows that there's no other component sitting next to the motion sensor.

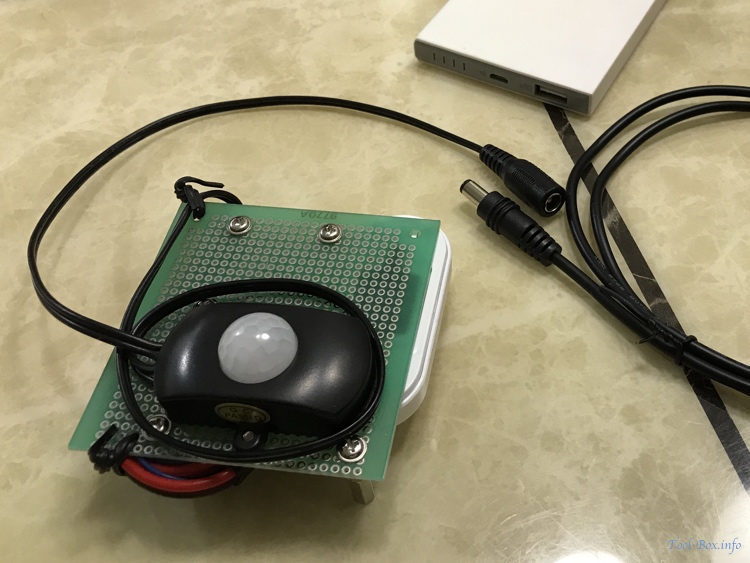
...and in the back
The electromagnet and the door sensor are tucked in the back with some excess wires and connectors. I've installed some standoffs here to ease the installation. Finally, I connected the finished device to a USB port near the installed location to power it. With the notification on the Smart Home app set to only come in the case this sensor detects "door closing", I can now know if anyone walks into the room it's installed in. Although I got my needs fulfilled now, I wish SKT would come up with a proper standalone motion sensor in the future so that this sort of repurposing isn't necessary.

Measuring current during activation
Before I wrap this up, I want to let you know how much power this newly created device consumes from the USB port. When it's active (i.e. electromagnet is powered) the measurements showed 81.0mA at 4.97V, which is equal to 403mW. It's similar to the standby power drawn by many energy-efficient electronic devices, so I could say it has negligible power draw even under frequent detection. In idle state, the power draw was 55.2μA at 4.98V, or 0.275mW, which is practically nothing (0.2Wh/month). Depending on the location, it could be powered with a battery for a good period of time.