Wearable Computing Project (6/10)
Posted by Wesley on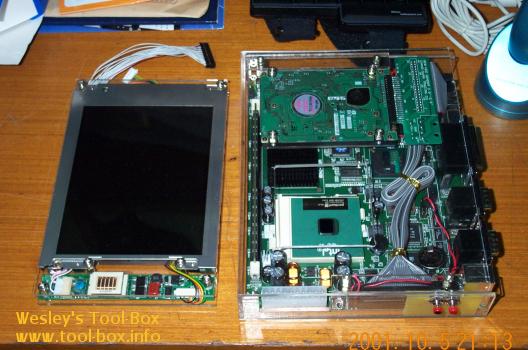
As usual, I chose to use the clear acrylic board ('Plexiglas') to house the components. As you can see in the picture, both the monitor and the main system looks quite nice in their casing. Because I now had some experiences with crafting the boards (I took a crafting class this semester) and I got myself a handheld electric drilling machine and some board cutting knives, I needed little help in creating the casing this time around.
Draw your attention on the monitor. It has two unconventional data cable sticking out of it; this is the native 32-pin digital data cable and the 10-pin power line of the LCD panel. These need to go through the conversion interface I've made earlier before being hooked into the motherboard. So I did do that, and boot up the system... and what gives? The LCD panel was going haywire. I had double-checked the interface board so as to not have any misconnections, so I was pretty sure I didn't make a mistake on my part. Therefore, I called the Eunpa and Maxan about this situation. After a bit of digging in, it turned out that the BIOS of the motherboard did not have proper support for my LCD panel yet, and the problem wasn't going to be addressed any time soon.

That was rather disheartening, as it meant the simplistic digital connection wouldn't be possible and I had to resort to analog-digital conversion of the video signals. I contacted Eunpa for an Analog-Digital Converter board, I could get it about a week later. Because of the dimensional constraints on the main system, I opted to add the ADC behind the LCD panel. This increased the thickness of the monitor by two times. It wasn't very elegant, but it was the only option I had at the time. But as you can see, at least the LCD panel displayed the screen properly. Finally! I was still annoyed about using the thick analog monitor cable, but I proceeded onto installing Windows 2000 and the whole setup went smooth.
Now came yet another big block in the creation of the wearable. I needed to power the system with a DC voltage input (i.e. battery). Despite the small size of the motherboard, it still used an ATX power connector for its power needs, and I've yet to come across an ATX power supply based on DC input. As you would all know, the casual power supply you can buy are plugged into an AC power outlet, not to mention big. I couldn't move around freely if I needed to plug my system into a power outlet (this is the obvious problem in my Portable Athlon). Also, even the smallest power supply out there, designed for 1U server, was too big to fit into my system. So I needed to tackle a two-fold problem of making a power supply small enough to be housed within the system, while it gets a DC voltage input.
Of course, trying to search for a ready-made product that meets such needs would be futile, and thus I decided to design a power supply of my own. With the electrical knowledge I've learned so far at school, and studying the ATX specification from Intel, I designed a circuit board capable of a single DC input and triple DC output, with the on/off control managed by remote-on pin, as ATX specification pointed out. This feature is necessary for software controlling of the power, e.g. if the operating system was to successfully turn off the system at shutdown. Using some high-efficiency DC-DC converters and some SSC (solid-state relay) I crafted a circuit board that followed my electrical design while conforming to the size constraint imposed in my system casing.
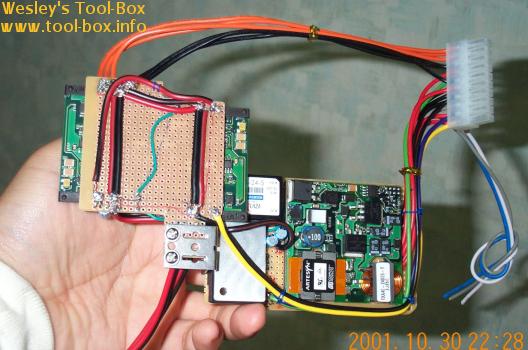
The said size constraint forced me to make the components be laid out in two bread boards, then linked together at different height at the middle. This way, one half of the circuit could come under the hard disk area, avoiding a short-circuit.