Building LCD Monitor (7/9)


Finished Casiing

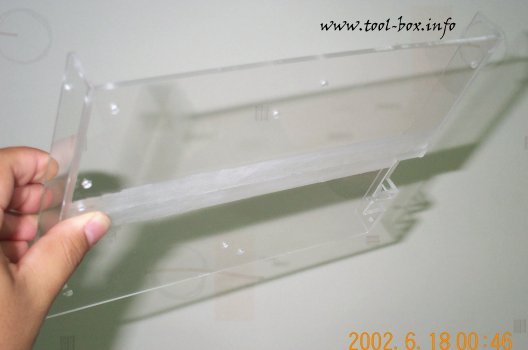
This is how the finished casing looks like. Far simpler than most used in the production monitors, but it gets the job done. Try that with CRT monitors. :-) The components will now be placed here.

Components in place

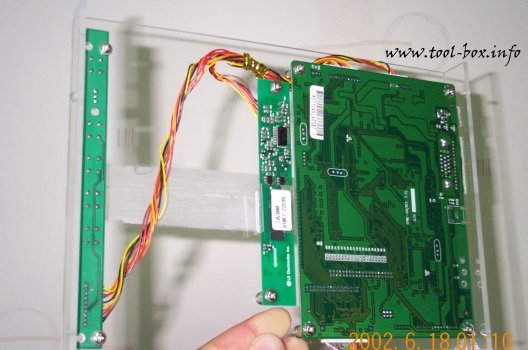
There are plenty of space left after placing all the components and connecting them together. The connectors are unique, so there is little chance you'll mix up and get them connected wrong. I can use the leftover space to add other components in the future such as AC/DC converter so I can power the monitor directly from the power outlet. Now all I need to do is to screw the LCD panel in place.

Trackbacks

Trackback specific URI for this entry

This link is not meant to be clicked. It contains the trackback URI for this entry. You can use this URI to send ping- & trackbacks from your own blog to this entry. To copy the link, right click and select "Copy Shortcut" in Internet Explorer or "Copy Link Location" in Mozilla.

No Trackbacks

Comments

Display comments as Linear | Threaded

No comments

Add Comment

E-Mail addresses will not be displayed and will only be used for E-Mail notifications.

To prevent automated Bots from commentspamming, please enter the string you see in the image below in the appropriate input box. Your comment will only be submitted if the strings match. Please ensure that your browser supports and accepts cookies, or your comment cannot be verified correctly.
CAPTCHA

Enclosing asterisks marks text as bold (*word*), underscore are made via _word_.
Standard emoticons like :-) and ;-) are converted to images.

Copyright (C) 1996-2024 Woo-Duk Chung (Wesley Woo-Duk Hwang-Chung). All rights reserved.