Seojun Smart Meter Review
Posted by Wesley on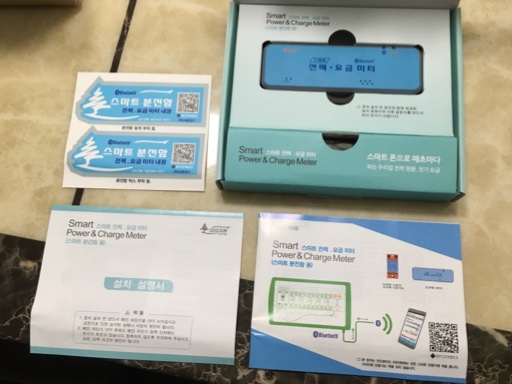
Contents of the Seojun Smart Power & Charge Meter package:
stickers, smart meter, installation guide, and user manual
stickers, smart meter, installation guide, and user manual
My home isn't particularly wasteful when it comes to electricity spending - it rarely exceeds 200kWh per month except for hot summer months. Still, I wanted to see the real-time usage to make further optimizations. After browsing through myriads of metering solutions, both domestic and abroad, I settled on a particular product sold by Seojun Electric.
Officially called "Smart Power & Charge Meter" model SJPM-B70 (I'll simply refer to it as "smart meter" hereafter), it connects to the main power line going through the primary circuit breaker inside the house. Once installed, it constantly measures and stores the power consumption data. This can then be accessed in real time by a smartphone via Bluetooth technology.
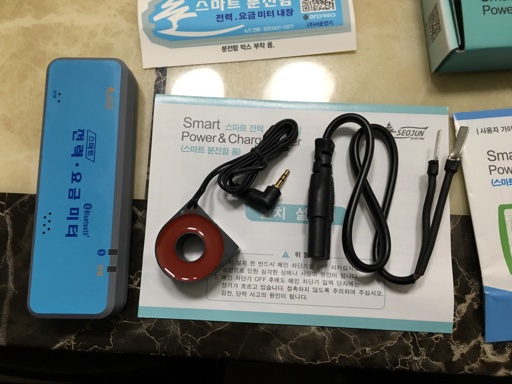
Current sensor and the power plug for the meter
The main thing going for this product is its cost and simplicity. It only costs KRW 42,000 (US$35) online, not much more than the power monitors you plug into an outlet. And you merely need to hook the sensor and the power plug into the right place to get it working - no further maintenance required. Instructions on how to do that are shown with diagrams in the included guide.
You also don't need to sign up for anything as the data stays in your house, fully under your control. As I don't need to have my consumption data shared and analyzed over the internet cloud, this was actually a plus for me. And in case you wanted to show that you have this smart meter installed, the package provides two blue stickers to let you do just that.
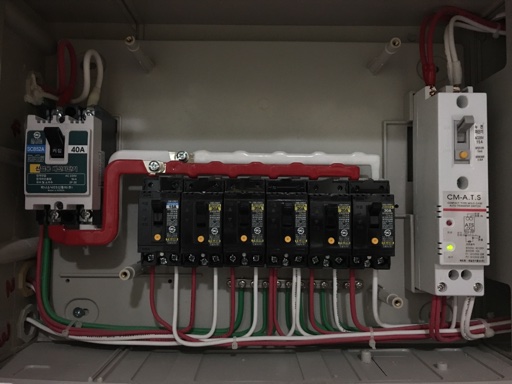
Insides of the circuit breaker panel at home
To get the smart meter installed, I temporarily cleaned out the wall cabinet that has the circuit breaker panel inside and opened the innards. The primary circuit breaker here is rated at 220V 40A. Since the meter is rated at 220V 70A (15.4kW) maximum, it should be good enough for me, as well as most Korean apartment houses.
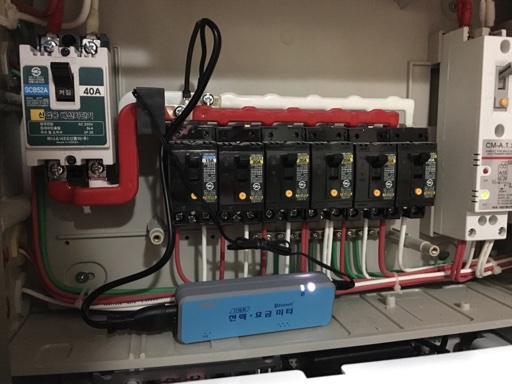
Current sensor and the power cable installed on the main power line
The current sensor is a closed ring with an internal diameter of 12mm. To install this on the main power line, I had to cut the main power, unscrew the wire (actually a metal bracket), insert the sensor, then screw the wire back. Many of the other metering solutions have this as a clamp that can be hooked on the wire without removing anything, so this is a bit of a drawback. Not too much, though, since I had to unscrew anyway to install the power cable for the meter.
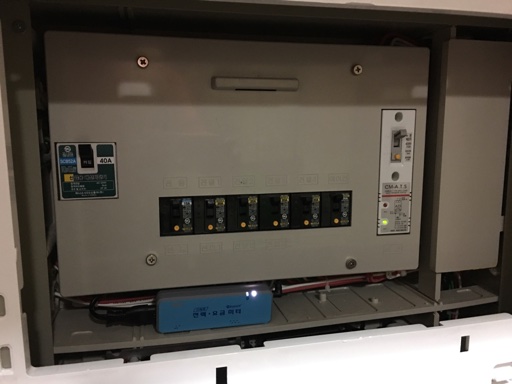
Circuit breaker cover reinstalled
Once I got the meter installed in a matter of minutes, I had the power back on and put the cover back. The candy bar-sized meter was still visible at the bottom, showing that it's working with its light on.
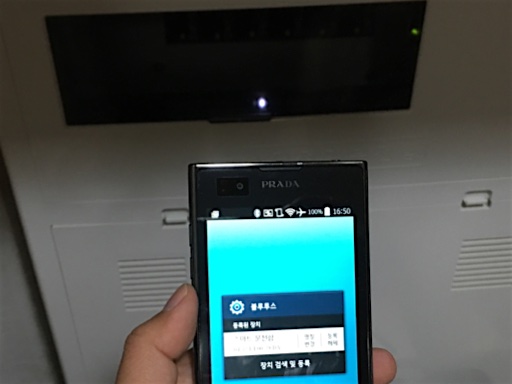
Pairing the smart meter with a smartphone via Bluetooth
Before putting stuff back into the cabinet, I wanted to see that the smart meter was functioning properly. Due to product limitations, the Bluetooth pairing would only work with an Android smartphone running v2.3 (Gingerbread) or later. As I'm primarily an iPhone user, this meant that I had to dig through my old smartphone collection. The latest Android phone there was LG Prada 3.0 from 2011, which easily met the requirements (runs v4.0 ICS) and had the largest screen among them (4.3 inches).
After a recharge and a furious round of long-overdue app updates, I installed the interfacing app provided by the manufacturer and launched it in front of the circuit breaker panel. It began searching for the compatible smart meters in the area, and quickly recognized the one I had just installed. I registered the meter into the app in a few taps and was able to see the power consumption data in real time right away.
Despite Bluetooth's limited range, I was able to receive data in the living room and in the kitchen, which were behind a wall. For those wary of someone eavesdropping on the data by coming close to the house, the app can configure the device to require a passcode to access the data, which is a nice touch.
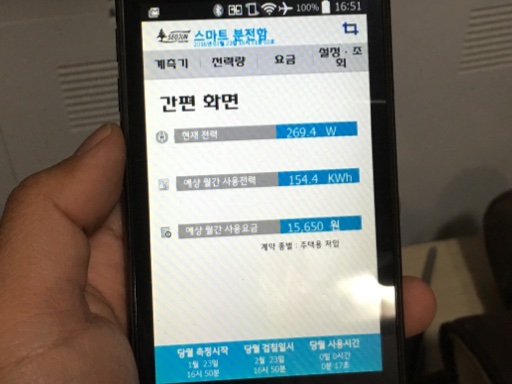
Reading real-time power consumption & projection from the screen
The main screen showed the current power consumption in watts, followed by the forecasted monthly usage in kWh and monthly bill in KRW, which are pretty much everyone is most interested in. The app already has the electricity rate profiles that KEPCO uses, so most Korean users would only need to configure the measurement period for the billing on the app for accurate forecasts.
On the real-time side of things, the app seems to get the data around every second, so it's easy to tell how much a certain appliance is consuming when it's turned on. Not only that, the app also provides real-time voltage and power factor data for those curious about the power quality. Monthly historical consumption / estimated billing data can be recorded and browsed up to 10 years back.
Overall, I'm quite satisfied with what this little smart meter provides, even with some obvious shortcomings. With the data I gather with this, I'm planning on making some changes to the house that will hopefully lower the power consumption even further.