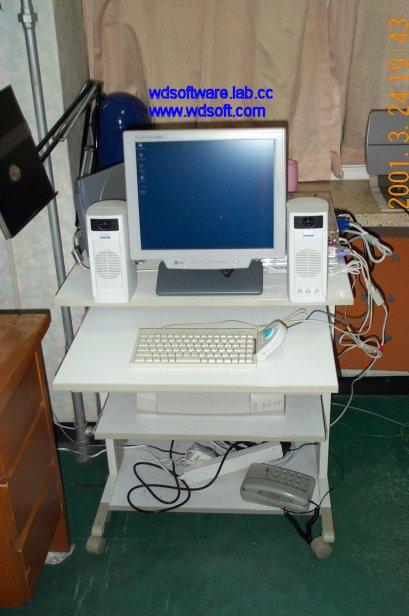
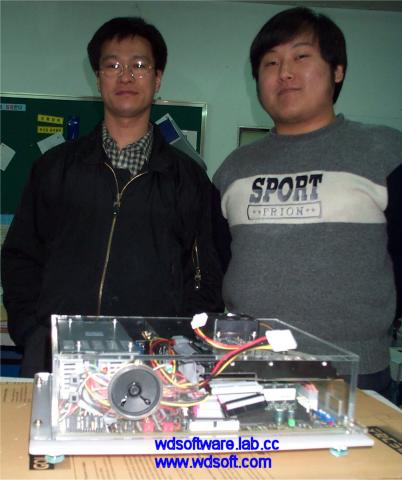
Making of the Portable Athlon (10/10)
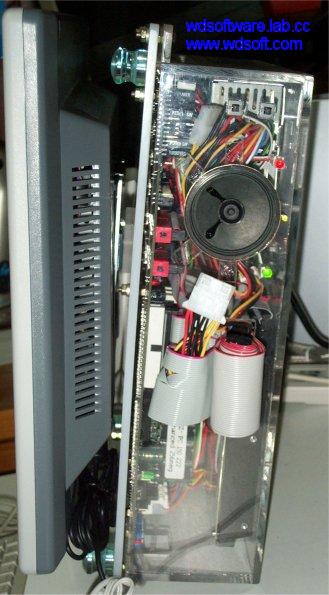
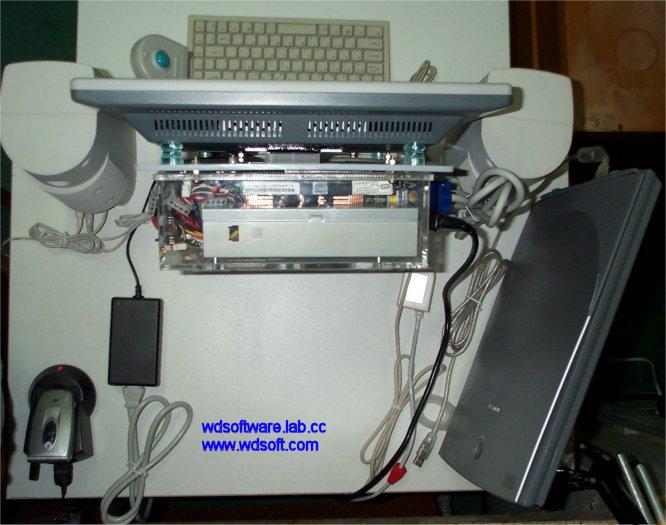
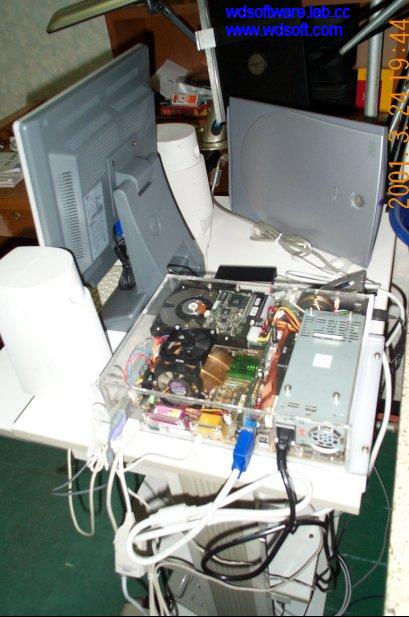
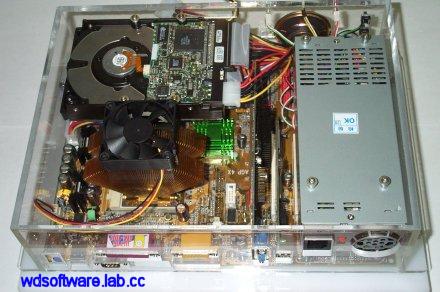
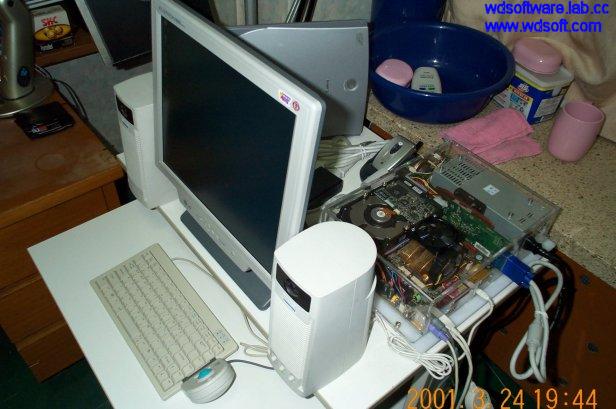

You would have noticed that the innards of the system has indeed changed since the initial photo shoot. To show you this more closely, I've taken a more close up picture.
The complete WDS-APX-0, close up
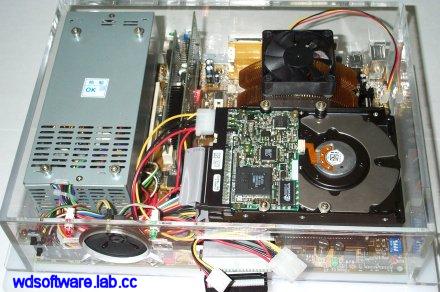
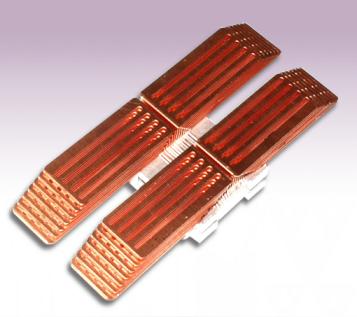
You can see how the copper flower cooler for the video card is attached, as well as the new fan that's cooling the CPU. Also, to prevent overheating of the PSU, a hole has been made over the vent holes. Some of the careful observers may point out that the wirings are a bit more organized, too.
The complete WDS-APX-0, with the RICOH burner
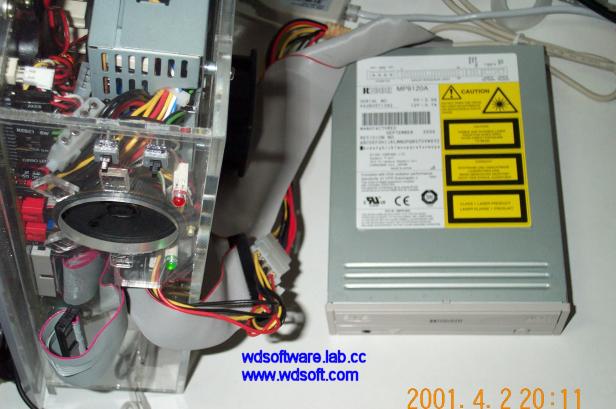
Here's how the RICOH burner gets attached to the system when I need to access optical discs or do some burning. The rolled IDE cable can easily extend out to accomodate the drive, and the drive has a power cable extension so that it can get powered.

Well, that's it for now. I may update this with pictures of me actually carrying the system in a bag or doing other stuff with it. But it's already close to 4AM as I'm finishing this up and I need some sleep. Yawn... Why is it that I always finish my articles when it's past my bed time? Argh...

Making of the Portable Athlon (9/10)


Of course! Attach it on the case itself! I had initially thought of attaching the panel in such way that it would completely overlap the case's bottom area. However, it would make matters complicated, as buttons or cables stick out of the broad side of the case, making it difficult to position it upright without separate support. The panel would not have good eye-level, either. So I chose a position that made the case stand taller.

If a panel was to be attached at such position though, total width of the system would inevitably get longer, so I need to detach the panel and turn it around when I was to carry the system around. Therefore, a hook was made and screwed on the panel, and an attacher from the stand was taken off and put on the case's bottom. Having done this, the panel could be easily attached and detached, yet be firmly seated while in use. Luckily, the weight of the panel and the system are pretty much on par and balance out perfectly, so I did not need a separate support.
The complete WDS-APX-0, side view The complete WDS-APX-0, front view The complete WDS-APX-0, back view
These pictures should show how the system looks like in general. You can see how the whole system is nicely hidden behind the flat panel. To help understand how the panel was attached, and how much space was saved by doing this, look at the pictures below.
WDS-APX-0's Panel and the System The complete WDS-APX-0, aerial view
The whole desk used to be occupied by the 17 inch monitor and a mid-tower case, with barely enough room for the speakers. But now, the speakers find its place easily and there's plenty of room even after placing a scanner and a cellphone charger.

Making of the Portable Athlon (8/10)


Up to now, you've seen the phase 1 of the system. Had I went on to show you up to this, this article would've ended here and be released much earlier. However, it would have the shortcoming of requiring a separate monitor to use the system, which would negate the purpose of this WDS-APX-0 somewhat, despite the fact that the system does already fit in a school bag. Thus I waited for a month after the completion of the phase 1 to make enough money for buying a dedicated monitor for the system. It had to be, of course, one of those costly LCD flat panel.
WDS-APX-0 with the Flat Panel Back View of WDS-APX-0 with the Flat Panel
Another picture can be found here. It's pretty evident that the two things go nicely together. You might notice another flat thing on the back, which is a slim scanner from Canon that is meant to be carried with the system when necessary. Speaking of the scanner, I also bought a RICOH burner with 12x10x32x8DVD capability with it, but it's not pictured here. This can be attached via 'extension cables' that comes out from the side of the case, which you might have noticed from the case pictures. I could have opted for a USB burner, but the current mainstream standard, USB 1.1, is bandwidth limited, so the drive that gets attached to it will show lackluster speed(USB burners top at around 4x burning). I also needed DVD capability like the old system I had, so the RICOH drive was perfect.

One problem, though. I cannot carry this panel with its base that huge and must be done away with. (Suppressing a bad All Your Base Are Belong To Us joke here....) But I can't have the flat panel hang along freely as if it was a tablet, either. What would have to be done?

Making of the Portable Athlon (7/10)


As the first phase of the system is complete, I gave it the name of WDS-APX-0, APX standing for Athlon Portable Experimental and 0 meaning prototype. Here is how the case looks on a more closed-up manner. I'm sure some of you have already seen the pictures of the coming pages, as I've already revealed these from time to time. Note that the arrangements and the looks are that of version 1.0. I've made some changes as saw fit since the pictures were taken.
Front View of WDS-APX-0 Back View of WDS-APX-0
The changes were mostly from the overclocking, as expected. The system by itself runs perfectly fine at default settings, but I couldn't let it sit like that, now that it has my T-bird CPU, meaning this would have to take the place my main system. I gave it my Corsair PC133 256MB RAM and took the KingMax RAM out because the hard disk passed over the RAM with enough space in between and I needed the extra 128MB. Running a 750MHz CPU at over 1GHz posed some heat problems, and I had to give up the 1113MHz, 1.85V setting I'd been using, and instead tried to find the highest speed that ran stably on default 1.70V setting, which was 1034MHz. That still didn't solve the heat problem completely, so I replaced the 60mm fan to a Sunon 2.6W one. It was more noisy and my roommate hated it, but I didn't have much choice.

Then there was the video card problem. The card came with only a black square heatsink without a fan. I tried on a 40mm fan on it, but it didn't help much on overclocking, as I was pretty much stuck to the default 190MHz core speed. So I decided to take the heatsink off. Shockingly, the heatsink was just loosely attached on the core by a double-sided tape and fell off with relative ease. It was just touching the corners of the chip. I guess it was small wonder the card was so cheap. I put a lapped Pentium cooler that's been rolling around my collection of old components onto the core instead, and tied it with a fishing wire. It was a lot better, but the fan was old, so it made grinding noises for about 5 minutes of turning on the system, which was often annoying.

Having shown the case to them, the people at Zalman were quite interested and decided to help out on the cooling and noise issue. The noisy CPU fan was twice replaced with the ones that's been in the lab. Many variations on the attachment method was tried out and initially, the two-fan design won out due to lower noise and good cooling. The Sunon fan was attached to the side of the heatsink with an adaptor that is screwed on the side of the vice that holds the fins. A low-profile Adda fan was placed where the Sunon fan was originally put (the top part of the case). A couple of weeks later, they were readying a new cooler design and a prototype was tried on my system. However, because of the design of the case being unusual, and because it was a prototype, it didn't fare well when the case was closed. The fan used on it, however, performed well, and now the two-fan design was replaced with the single-fan design again, this time with the new fan.
Zalman ZM17-CU. Picture courtesy of Zalman Tech.
Meanshile, on the video card side, they were producing their new copper video card heatsink, ZM17-CU. I had the priviledge of attaching this on my video card, replacing the noisy Pentium cooler. Afterwards, I put the 60mm Adda fan that was taken off the duty of cooling the CPU onto this video card heatsink, since ZM17-CU does not have any fan attached by default.

Making of the Portable Athlon (6/10)


One of Dad's friend runs a synthetics company that makes all sorts of things from sign boards to commemoration plaques. He told me that this should be a suitable place to make the case I designed, and made an appointment to do so on the 17th. I showed my dad's friend the design, and he noted that some 5mm-thick acrylic boards should be used so that it wouldn't become brittle. He chose a white board for the bottom and some transparent boards for the rest of the sides so that it would become see-through. I thought it was a wise decision to do, as a see-through design is cool to look at(yes, I was impressed with an iMac).
Bottom Panel is Made
Instead of using my measurements though, he marked the places to cut out or drill as he put the parts upon the board. Maybe I shouldn't have spent the whole night measuring and recording... After about 4 hours of work, the case was near completion. The speaker wire fell off as it was getting attached, but the problem was quickly solved with some passes of soldering iron.
Hard at Work
After the top transparent part was completed, the necessary parts such as the power supply and the hard disk was attached on it, and everything was connected as it should. There was a bit of trouble closing the case as so many components are cramped into such a small area, but after a bit of shifting wires around, it was successful; the design worked and everything did go in. The four bolts that binds the upper and lower parts were fastened and all was done. The portable Athlon became a reality. Here's the commemorative photo shoot below, with the maker and the designer. Yes, that's me on the right.
The first photo of the completed case, with the maker and the designer
Some photos of the case coming up...

Copyright (C) 1996-2024 Woo-Duk Chung (Wesley Woo-Duk Hwang-Chung). All rights reserved.