On installing and configuring HomeKit lighting
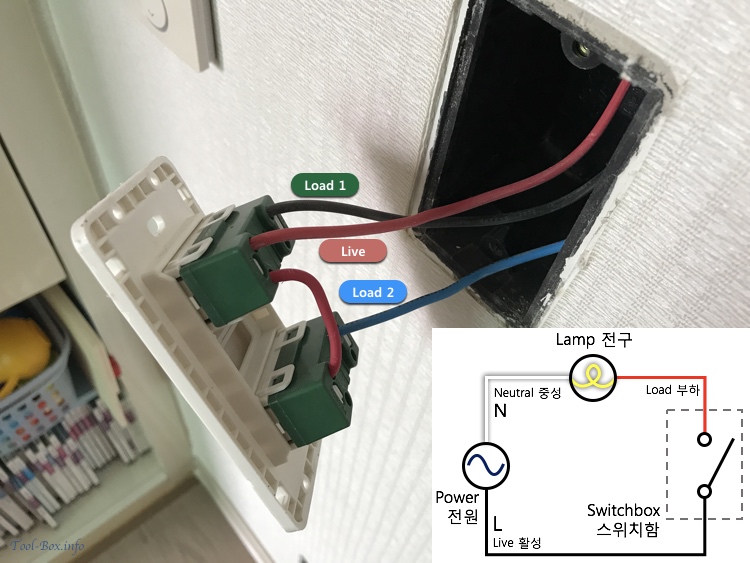
Posted by Wesley onThere are some things to consider and take action when you're installing smart lighting, HomeKit enabled or not, around the house. For the light switches, the biggest concern is the presence of a neutral wire. In most cases, you need this for a smart switch to function, but many switch boxes omit this and make things complicated. To see why things are like this, we need to take a look at the circuit diagram.
For a light to turn on, it has to connect to both ends of a power source. This is generally a single-phase AC power, which can be derived from a 3-phase AC power by using one of the phase wire and a neutral point. The wire connecting to the neutral point becomes the "neutral (N)" and the phase wire, the "live (L)" as seen in the diagram.
With a regular switch, all you need to do is to connect or break the connection between the live wire and the "load" wire leading up to the lamp. Therefore, a switch box only needs to have the live wire and one or more load wires coming out of it. Number of load wires correspond to the number of controllable light fixtures, of course. Neutral wire could also be present, but it wouldn't be connected to anything because there is no need to.
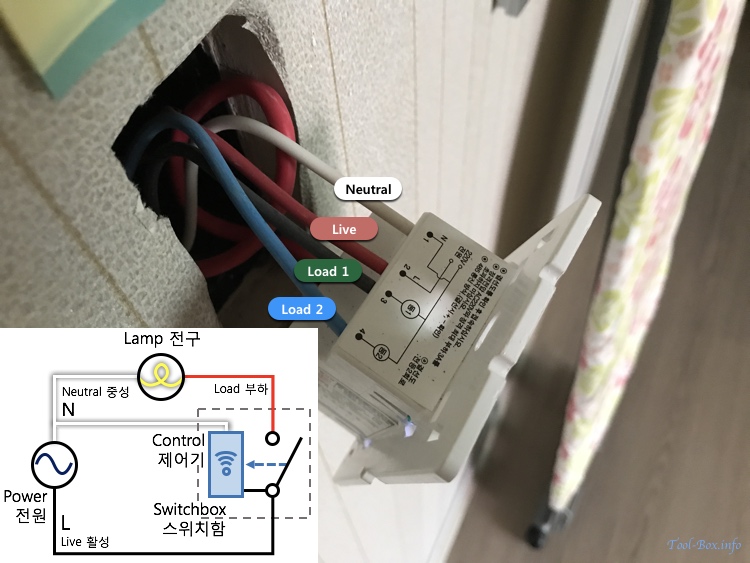
Smart light switch installation and its circuit diagram
The situation becomes different with a smart light switch. In order for the control module in the device to work, it also needs to connect to both ends of a power source, but at all times and independent of the lighting. As the live wire is already present, we need to add the neutral wire to the device as seen in the circuit diagram. With this configuration, the switch connected to the live wire and the load wire could be controlled either manually or by the control module. This is the reason why most smart light switches require the neutral wire.
The rare exceptions that can forgo the neutral wire have the control module connect between the live and the load wires. The module itself consumes little power and a very low current leaks through the load wire in the "off mode" so as to effectively prevent the lighting from turning on. But this generally requires the lighting load to be sufficiently large. If not, the leaked current may cause the lighting to flicker or cause other problems. In other words, this solution isn't as widely compatible as the switches using a neutral wire.
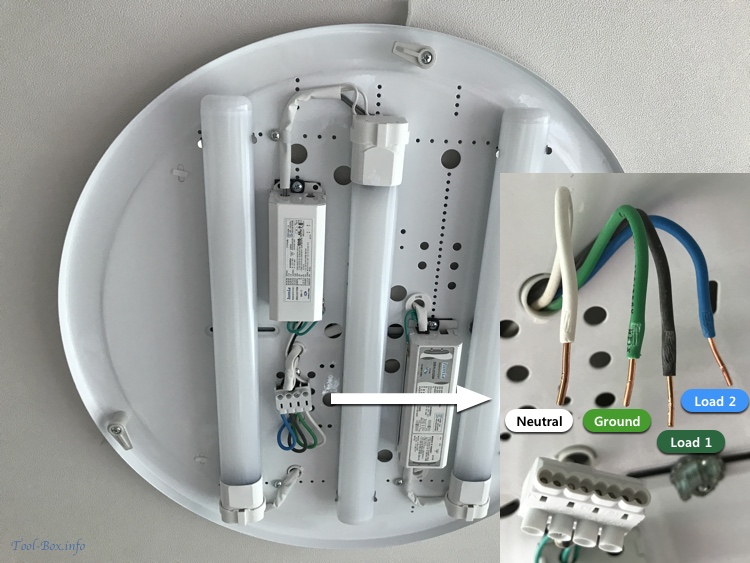
Neutral, ground, and load wires connected to a light fixture
So what if you want to install a smart light switch, but the switch box lacks a neutral wire? Where do you get one? The answer is from the light fixture. As you have seen in the previous circuit diagrams, a neutral wire will always be connected to a lighting. The load wire(s) originating from the switch box will be present, along with one or two more wires of different colour.
In many cases, the neutral is coloured white, while the ground wire is green. If you are unsure which is which, disconnect one of them and try turning the light on. If it still lights up, then you have disconnected the ground. Once the neutral wire is identified, attach an additional wire of the similar gauge to it and route it to the switch box to finish up.
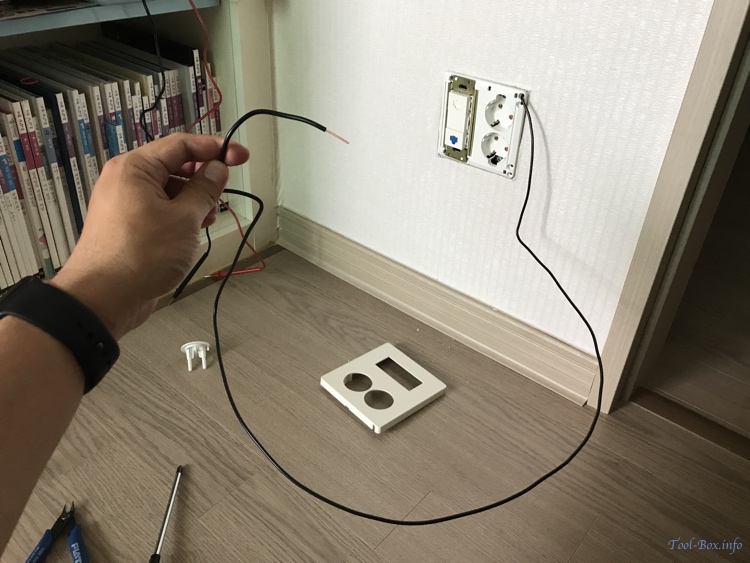
Extending a neutral wire connection out of a power outlet
There may be other sources of neutral wire, such as a power outlet near the switch box. But using this may be a bad idea if your home has multiple circuit breakers that can cut off certain types of load. At my house, the lighting and the room outlets are on different breakers. When I connected the neutral wire from the outlet to the smart light switch, the breaker for the lights went down because such connection was seen as a power leakage.
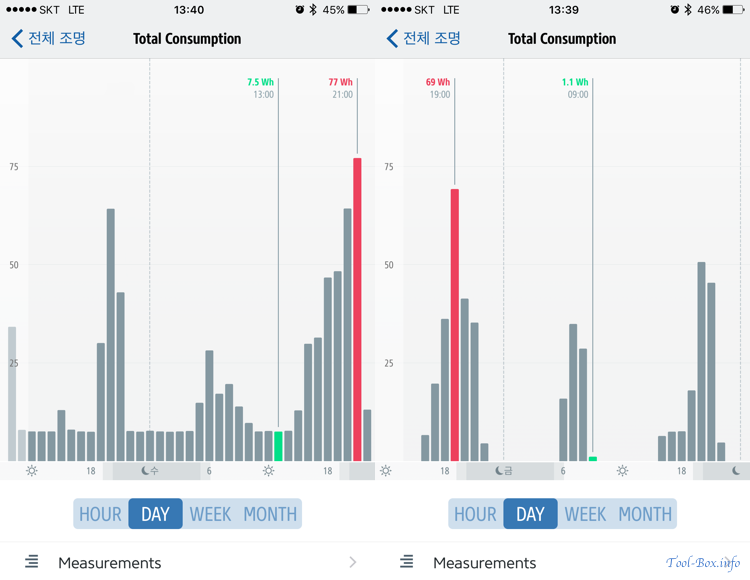
Pattern of power consumed by lighting before (left) and after (right) conservation scheduling
Speaking of the circuit breakers, I have an Elgato Eve Energy connected to the one managing the lighting load to monitor the power usage of the lights. Once I got my new switches up and running, their aggregate standby power consumption was around 7.5W, not an insignificant number. More than half of that was coming from the Koogeek HomeKit switches.
I wanted to minimize the waste, while not sacrificing the usability. So I identified the periods when the lights were not used most of the time - late at night and the middle of the day. I set up a HomeKit schedule to cut the power to the lighting load during those periods, so for about half a day, there would be zero standby power. Smart light bulbs are connected to the outlets and are not affected, so they would still provide lighting on demand as the secondary system.
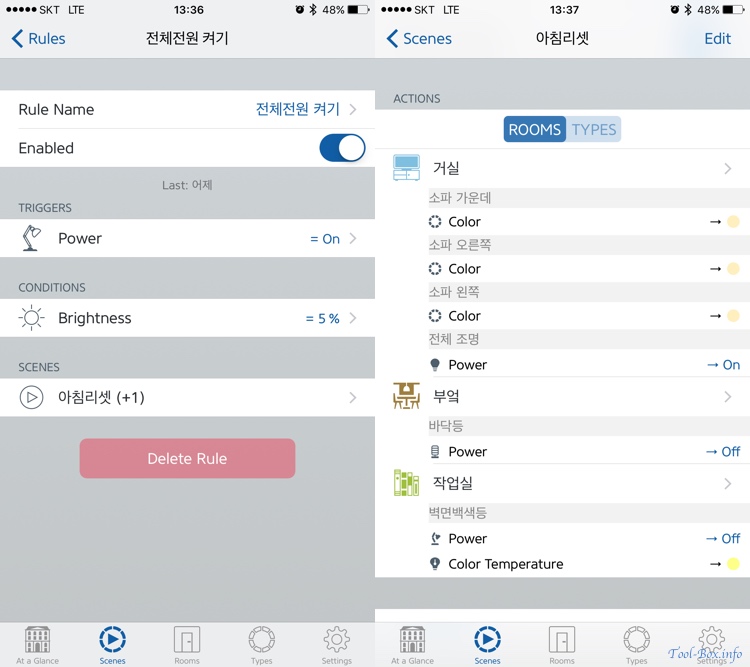
Scene(automation) setup to restore power to lighting the moment a specific Hue bulb is turned on
I knew that there would be times when someone in the house might want to turn the main lights on during the "off" periods, preferably without involving a smartphone. I wanted to use the Philips Hue Dimmer Switch for this purpose, but it isn't recognized by the HomeKit framework and thus unable to control a non-Hue device.
To work around this issue, I programmed the dimmer switch's first action to turn a specific light on at 5% brightness and created a HomeKit scene that will trigger when that happens. Once triggered, it would restore power to the lighting load while turning off the Hue bulbs that were turned on because of the switch.
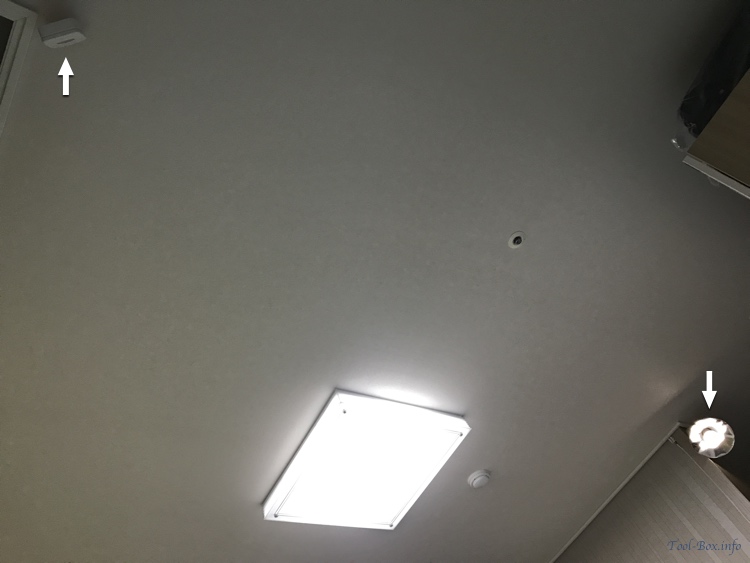
Elgato Eve Motion (left), light fixture (middle) controlled by a smart switch, and a Philips Hue light bulb (right)
Meanwhile, the secondary lighting system consisting of smart light bulbs (Philips Hue) are automatically activated by Elgato Eve sensors. Usually, motion detected by Eve Motion turns on these lights at a specific colour and brightness suited for the most likely activity to take place in the room. The reason why Hue lights are secondary is because a single LED lamp on a 2G11 socket inside a room's main light fixture delivers 2250 lumens, nearly three times as much as a Hue light bulb's 800 lumens.
Obviously, Hue becomes redundant should I turn the main lights on to brighten up the room further. Once smart switches were installed to control the fixtures, scenes(automation rules) were set up to make sure Hue lights are not used when the main lights are on. Hue lights get turned off when the main lighting is activated. While the main lighting is active, motion detection does not trigger the Hue lights.
To summarize, I delved into detail on the why and how the neutral wire is used, then explained the scenes(automation rules) used in the primary and secondary lighting for power conservation and automatic illumination.
Before I finish, the aforementioned Elgato Eve Motion is not currently known for quickness. This is something I noted in an earlier post. To recap, a HomeKit scene is triggered about 3 to 5 seconds after motion is detected due to the way iOS 10 polls the Bluetooth LE devices. As a result, I have to wait a few seconds after entering a room before the Hue lights are turned on. This problem is supposed to be addressed with a different polling method in iOS 11 and a future firmware update from Elgato to accommodate it, reducing the delay to about 1 second.
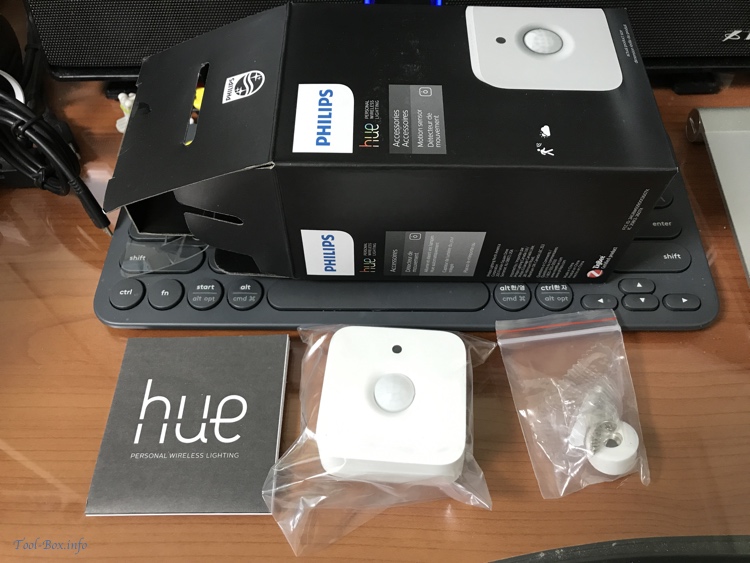
But when I started installing Hue lights several months ago, the way around this problem was to use a Philips Hue Motion Sensor, which reacts almost immediately, in addition to the Eve Motion. Sadly, it couldn't be a complete replacement as it only works with Hue lights because it isn't exposed to the HomeKit ecosystem from the Hue Bridge. There is no logging or notification, either. Thus, I only bought it for a spot where Hue light is definitely used and the reaction delay is unacceptable.
Interestingly, Philips has just announced at IFA 2017 that the Motion Sensor, Dimmer Switch, and the Tap Switch will soon work with HomeKit. This means that I may no longer need to use the workaround for activating a HomeKit scene, and the iOS 11 update to speed up the Eve Motion may not obsolete the Hue Motion Sensor. Exciting times are ahead. I'll get back to this when all the supposed updates come as promised.
Ihe iOS 11 will make its use obsolete.
Defined tags for this entry: electricity, Elgato Eve, HomeKit, IoT, Koogeek, light fixture, lights, Philips Hue, power switch, sensor
