The Heatpipe Mod on XPPort-II (4/11)


The heatsink bases are installed

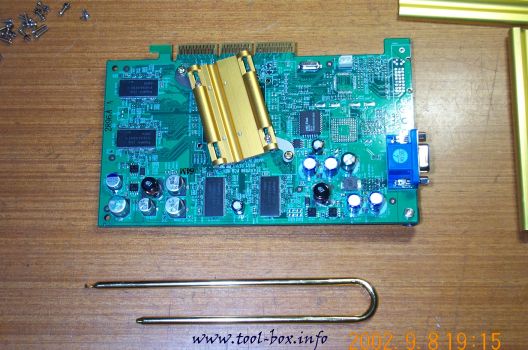
The heatsink bases were assembled on both sides using the bolts, rubber standoffs, and nuts that are provided with the heatpipe cooler package. You'll notice the groove that is present on the heatsink base. This is where the heatpipe is supposed to make a clean contact with, in order for it to transfer heat between the heatsinks properly.

The heatpipe is inserted between the bases

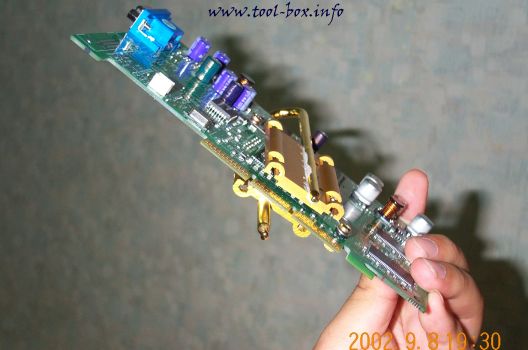
The heatpipe was now inserted on the heatsink bases. For efficient heat transfer, thermal paste was spread around the areas that got in contact with the heatpipe. One of the obstacles in installing the heatpipe was the capacitor that was sticking out at the top middle of the circuit. As you can see in the picture, the heatpipe narrowly avoids it and makes a safe round around the video card.

Trackbacks

Trackback specific URI for this entry

This link is not meant to be clicked. It contains the trackback URI for this entry. You can use this URI to send ping- & trackbacks from your own blog to this entry. To copy the link, right click and select "Copy Shortcut" in Internet Explorer or "Copy Link Location" in Mozilla.

No Trackbacks

Comments

Display comments as Linear | Threaded

No comments

Add Comment

E-Mail addresses will not be displayed and will only be used for E-Mail notifications.

To prevent automated Bots from commentspamming, please enter the string you see in the image below in the appropriate input box. Your comment will only be submitted if the strings match. Please ensure that your browser supports and accepts cookies, or your comment cannot be verified correctly.
CAPTCHA

Enclosing asterisks marks text as bold (*word*), underscore are made via _word_.
Standard emoticons like :-) and ;-) are converted to images.

Copyright (C) 1996-2024 Woo-Duk Chung (Wesley Woo-Duk Hwang-Chung). All rights reserved.