The Heatpipe Mod on XPPort-II (8/11)


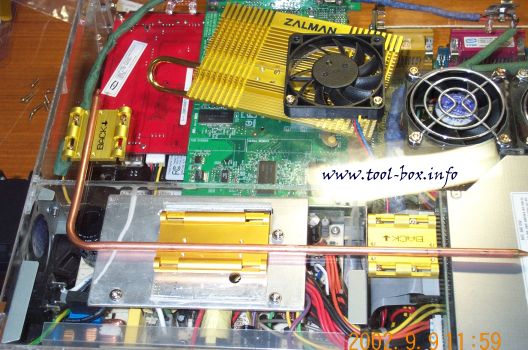
All three bases were installed according to the shape of the heatpipe. The heatpipe is the same thing that are used in the Zalman video card heatpipe coolers; straight from their heatpipe manufacturing facility. The only difference is that I had requested a specific 90-degree bend like this, instead of the usual 180-degree bend.
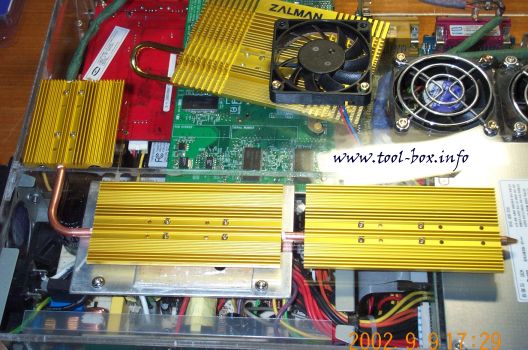


To finish up, I used the heatsinks from the ZM50-HP. The top left one is the front side heatsink, and the bottom ones are the back side heatsinks. With these three heatsinks acting as one through the heatpipe, I can efficiently spread and dissipate heat, far better than the copper heatsink that used to take place, while actually weighing almost the same. In fact, now I can touch the heatsink without the fear of getting a burn. This was immediately noticeable in the video card, as now the 3D game screen does not show any anomalies even without having the ramsinks attached like the picture above. That's how cooler it is now.
The Heatpipe Mod on XPPort-II (7/11)


The bulk of the components that were not used for the video card heatsink were to be used to cool something that had been a relatively big problem for my system, and it actually does have to do with cooling the video card a bit, too.


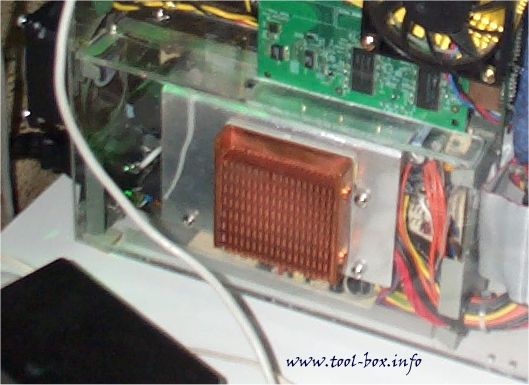
This is the close-up of the PSU (power supply unit) which provides electrical power to my system. This is a powerful 300W model that is fit into a relatively small form factor, and was originally intended for use in 1U servers. Due to the high capacity, though, the aluminum heatplate connected to the regulators tend to get very hot, to around at least 80C, and is probably sufficient enough to cook an egg, literally. In the picture above, I had attached a copper heatsink to combat this glaring heat problem, but this proved to be of little help since there's no fan on this thing and it couldn't get the heat dissipated well, having too small a surface area for sufficient natural convection cooling.

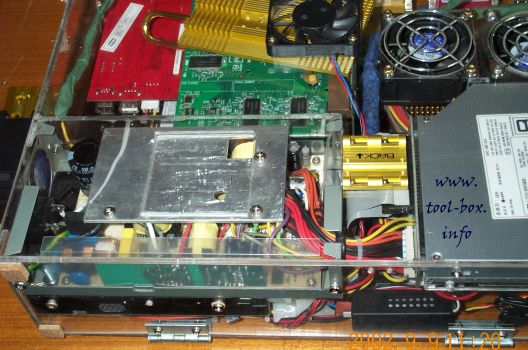
Now, if you look at the area just above the PSU, you will notice that the video card literally sits on top of it very closely. Obviously, the heat generated from the heatplate will affect the video card and it gets unintentionally hot. This would not only hamper the reliability of the video card, but also its overclockability. I needed a better way to cool the PSU.


It was rather difficult to remove the copper heatsink that I had attached. Apparently, I attached this thing almost too well. I was afraid I might break the case trying to remove it, but I managed to do it without much drama while having the PSU heated up. After the removal, I started installing the heatsink bases that would hold the heatpipe and the heatsinks into place.

The Heatpipe Mod on XPPort-II (6/11)


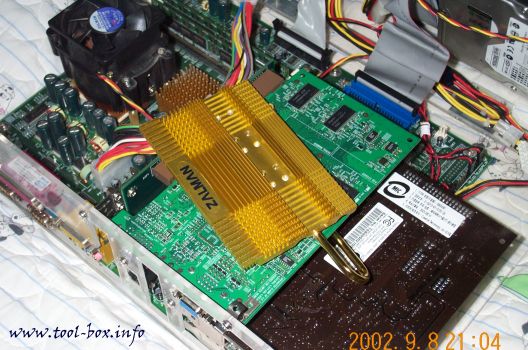
Video card installed into the system

But this is no standard system at all. Because of the AGP riser that the video card plugs into, the heatsink can extend beyond the AGP slot without much trouble. Sure, it looks a bit unusual, but does it really matter if it works anyway? :-)

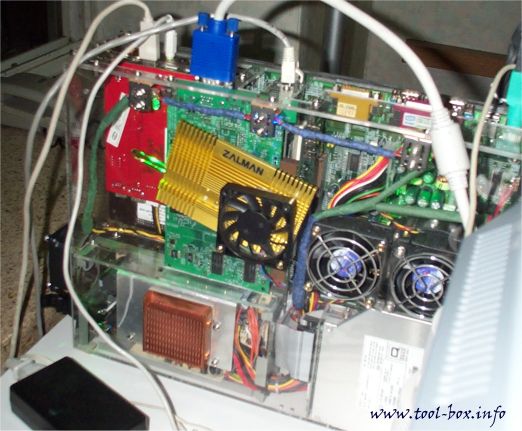
The system in operation with the new cooler

To help cooling the video card's GPU, I've added a 60mm fan on the case. To keep the noise level to the comfortable level, this fan was also set to operate at 5V. I noticed that this fan made a faint scratching noise occasionally, so I replaced it with the stock fan that came with the heatsink that came with the AthlonXP CPU I bought for this system later on. We're not done here. Read on.

The Heatpipe Mod on XPPort-II (5/11)


After the heatpipe is inserted into the heatsink bases, the last step I needed to do is place the appropriate heatsink on each side and fasten it with bolts. Again, I needed to apply the contact points with sufficient amount of thermal paste so that heat can be seamlessly transferred to and from the heatpipe for effective thermal dissipation.

Front side of the video card

This is how the front side of the video card looks after the installation. This small heatsink is the standard front side heatsink for ZM50-HP model, and if it were not for the heatpipe linking to another heatsink at the back, it would have been completely insufficient for cooling the GF4 Ti4200 core that lied beneath it.

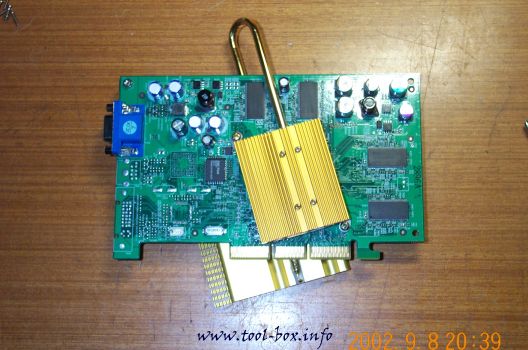
Back side of the video card

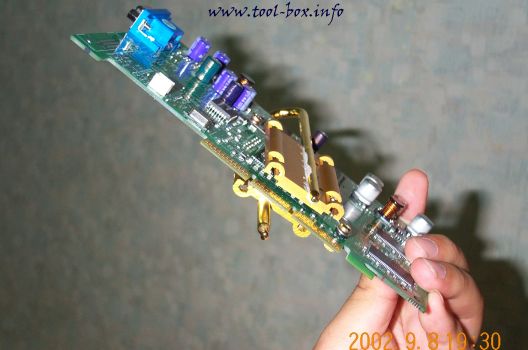
Flip the video card and you see this. The huge heatsink here is the aforementioned standard back side heatsink for ZM80-HP model, and thanks to the heatpipe most of the heat dissipation happens here without overloading the front side heatsink. You may wonder how this card can actually be plugged into the system without problems since the heatsink obviously extends beyond the AGP port connector. It's true that this card cannot be installed on a standard system...

The Heatpipe Mod on XPPort-II (4/11)


The heatsink bases are installed

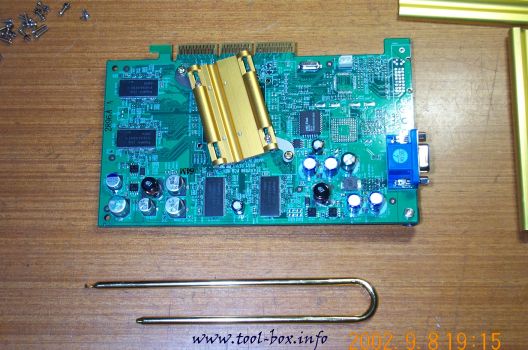
The heatsink bases were assembled on both sides using the bolts, rubber standoffs, and nuts that are provided with the heatpipe cooler package. You'll notice the groove that is present on the heatsink base. This is where the heatpipe is supposed to make a clean contact with, in order for it to transfer heat between the heatsinks properly.

The heatpipe is inserted between the bases

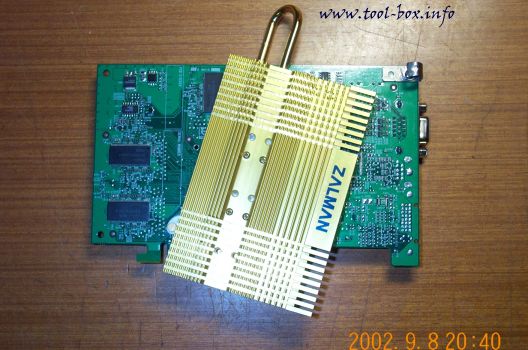
The heatpipe was now inserted on the heatsink bases. For efficient heat transfer, thermal paste was spread around the areas that got in contact with the heatpipe. One of the obstacles in installing the heatpipe was the capacitor that was sticking out at the top middle of the circuit. As you can see in the picture, the heatpipe narrowly avoids it and makes a safe round around the video card.

Copyright (C) 1996-2026 Woo-Duk Chung (Wesley Woo-Duk Hwang-Chung). All rights reserved.