The Heatpipe Mod on XPPort-II (2/11)


That would've been the end of the story, had it not been for the annoyingly large amount of heat pouring out from the stock heatsink installed on the GF4. The heatsink was quite hot even when running at normal speeds, which was worrying me. Furthermore, the 50mm fan installed on the heatsink made a noticeable whine, running at 12V, which was disturbing since all my system fans were running at 5V, low-noise operation. The stock heatsink had to be dealt with. Then I remembered that Zalman Tech had a new video card heatsink they wanted me to test out.
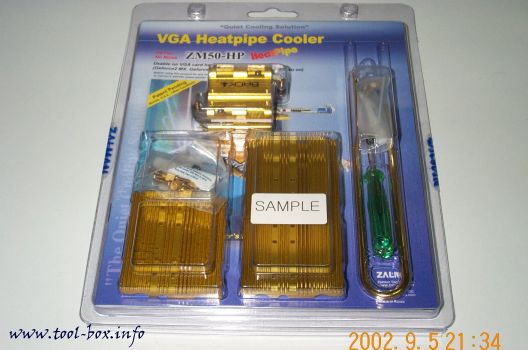
Zalman ZM50-HP cooler package

The ZM50-HP video card cooler is unlike any previous coolers Zalman had created to date. It does not have their trademark 'flower heatsink' design, while it showcases one of the newer cooling technologies known as heatpipes. A heatpipe, simply to put, is sort of a 'superconductor' in terms of thermal aspects. It can transfer heat from one end of a foot-long pipe to the other end in a matter of a couple of seconds, which is at least tens of times faster than what you can expect with a solid tube made of copper, one of the most thermally conductive elements.

The heatpipes here are used as a quick heat transport between the multiple heatsinks in the heatpipe-linked cooling system. This means that the heat generated from the heat souce (i.e. video card's GPU) is quickly and evenly moved to all the heatsinks on the heatpipe, so the effective heat dissipation area is effectively increased, no matter how far apart they may be. In contrast, a conventional heatsink cooling system will have the heat concentrated near the heat source and thus the heatsink fins farther away from the heatsink would not be as effective in dissipating the heat compared to the ones near the heat source. You can clearly see that the heatpipe can greatly enhance the cooling performance when properly integrated to a cooling system.
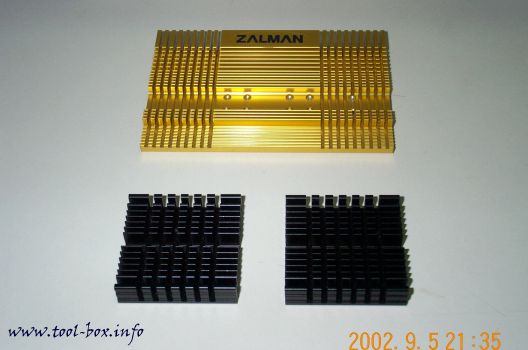
Bigger heatsinks for better cooling

The ZM50-HP model, however, is targeted at budget-level video cards with relatively low heat output. For a higher performance video card like the GF4Ti card I now have in my system, I need to use a bigger heatsink. This is why I will use a heatsink from the ZM80-HP model. This model originally comes with two massive heatsinks that is almost as big as a GF4Ti card itself. You can see one of these in a picture above. I can only use this huge heatsink on the back side of the video card because the front side does not have enough room. So my personal video card cooler will be a mix of the ZM50-HP and ZM80-HP models. In addition to this, I bought some old heatsinks made for cooling classic Pentium processors that I would cut up to use as ramsinks (heatsinks for memory chips).
The Heatpipe Mod on XPPort-II (1/11)


The single most annoying thing that bothered me in designing the series of Portable Athlons (First & Second) is that I could not use a full-height video card. This is because the system's internal dimensions limit all components to be less than or equal to around 8cm. Even a relatively shorter card (among full-height) such as a conventional GeForce3 Ti200 models are at least 9cm, and the higher performance cards like GeForce4 Ti series are 11cm in height. If I were to try using these cards, the top part would stick out of the case in an ugly manner. Meanwhile, a budget-sector cards like GeForce4 MX can come in a low-profile version, measuring around 7cm in height, which easily fits into the system.

Unfortunately, this meant I was to be kept in an infinite loop of budget-sector cards, since there is little chance that a video card manufacturer would make a high-performance model into low-profile version. This is due to the design constraints (high-performance cards need a lot more supporting components for proper operation) as well as the appearance factor (low-profile video cards tend to look cheap). This does not bode well when you're seeking ultimate performance out of your system. Also, there's already a mobile version of Radeon 9000 out, meaning that a notebook computer in the near future can beat my GF4MX-equipped system in game performance, while there is no low-profile version of Radeon 9000 to be found.

So I concluded that something dramatic had to be done. No, that didn't mean I'd throw out the Portable Athlon idea altogether and go back to the traditional case. I discovered that I was neglecting a fairly obvious design improvement - rotate the video card like I had already done with the PCI cards.

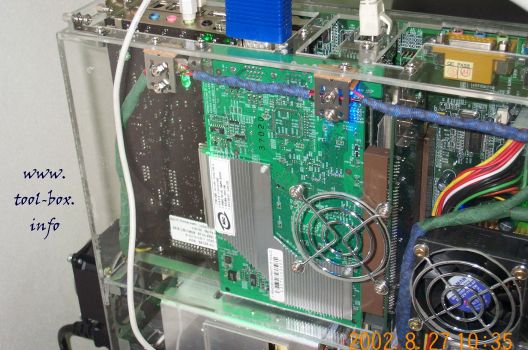
Rotated GeForce4 Ti4200 in XPPort-II

This might not look normal. In fact, it isn't; you don't see many video cards plugged in parallel to the mainboard. This had been achieved by using a tall AGP riser card which rotates the AGP port 90 degrees at a height of around 6cm. This way, I only sacrifice one possible PCI slot, which wasn't in use at the time anyway. The area where the PCI card could have been now has the video connector sticking out.

Arrangement of expansion cards

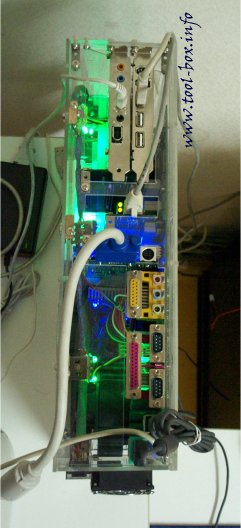
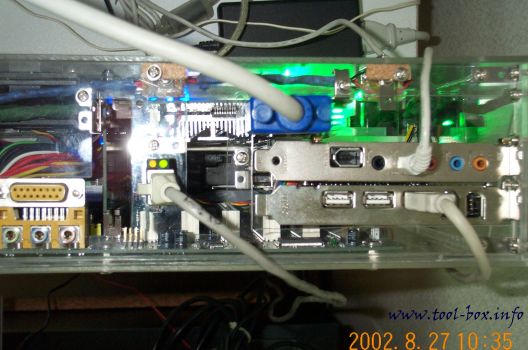
This is the way it is looking from the top. It does have a very unorthodox arrangement of cards. To the far left, you can see the AGP riser card sticking out and the video card connecting to it from the top area. To the right, there is a PCI riser card that provides connection to the SB Audigy card and the USB2.0/IEEE-1394 card. In the middle, the LAN card takes an unusual position in between. This is possible because it is very small and does not touch the video card's heatsink at all.

Finally, I was able to break free from the vicious loop of budget video cards. As some of you might have noticed, I have now plugged in a GeForce4 Ti4200 card from Leadtek as the video card. It's a WinFast A250LE Light model, which does not have the video-out plug or the DVI connector, of which I have no use for. Even the fastest card currently released, Radeon 9700, has almost identical dimensions, so my upgrade path has a bright future.

The Second Portable Athlon (10/10)


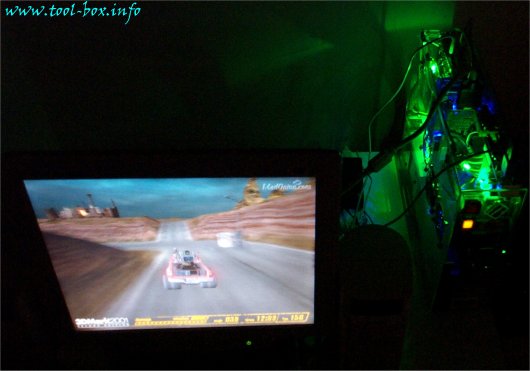
The system is busy running MadOnion 3DMark2001 benchmark. It's quite a performer, actually, currently ranked at #1 in its class, defined as the group of systems using Athlon XP 1800+ (1500 ~ 1567MHz) CPU and GeForce4 MX440 based video card. It's also the 2nd fastest MX440 based system that uses Athlon XP 1900+ or under as the CPU. The results are uploaded in MadOnion's Online Result Browser database here, with the 3DMark score of 6628. Average score for the same configuration is around 5300 3DMarks.


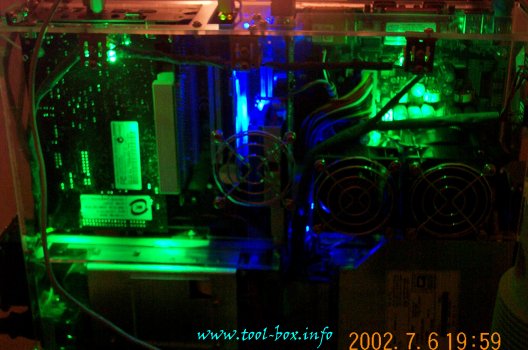
The side view of the system in the dark. The glow is pleasant to look at.

Here are the specifications of the main system:

CPU: AMD Athlon XP 1700+(1467MHz, 1.75V) AGOIA  @ 1537MHz, 1.525V
Cooler: Zalman CNPS5100-Cu, fan @ 5V (silent mode, ~20dB)
Chipset / FSB: VIA KT333 AGPset / 170.8MHz (341.6MHz DDR)
Memory: 512MB (KingMax PC2700 DDR 256MB x 2) @ 341.6MHz DDR
Video Card: Garnet GeForce4 MX440 Pro @ 320MHz core / 595MHz memory
Sound Card: Creative SoundBlaster Audigy
LAN Card: Realtek RTL8139C based 100Mbps Ethernet
Expansion: IEEE-1394(FireWire) x 4, USB 2.0 x 4
CD-ROM: LG CRN-8245B (24x CD-ROM Read)
Floppy: 1.44MB x 1
Power Supply: Matrix Power MB300-VA (300W, PFC)
Total Fans: System x 3, CPU x 1, Video x 1 (all 60mm, 5V operation, ~3000rpm)
OS: Microsoft Windows 2000 SP2
Total Weight: 5.44kg (12.0Lb)


With this much functionality and performance, it will probably surpass the power of any computer system packed in twelve pounds. :-) Well, that's it for now! The system will be continually upgraded, of course. I will try to post another article as dramatic developments take place. Until, then, see you around!

The Second Portable Athlon (9/10)


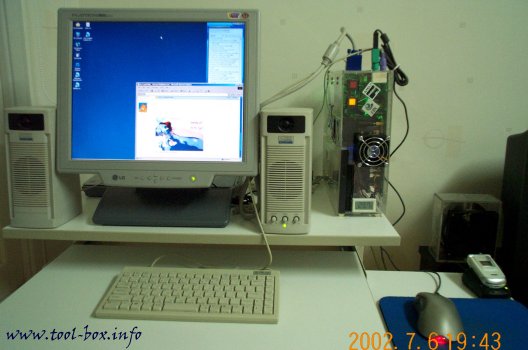
The Portable Athlon II's official name is, as mentioned earlier, XPPort-II. This is to signify that it uses Athlon XP, and that it's the second portable unit I've built. The monitor has not been integrated to the system yet, so I need to use the portable monitor that I made earlier instead when I need to carry the whole system around. Most of the peripherals were carried over from the original system, as you can see.


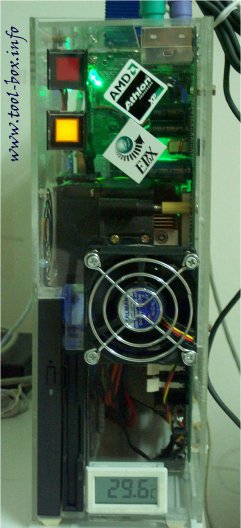
The front and the top view, respectively. The yellow button is the power button and it lights up when the system is operational. The red button is the reset button, and it lights up when the hard disk is being accessed. You can see the front case fan pulling the hot air from the CPU cooler and exhausting it (it's a good thing to avoid facing it directly), as well as the slim size CD-ROM and floppy drive combo. To facilitate connection of the peripherals, I made all the connectors to face up, so I can simply plug stuff from top. By doing this, I do not need to face back to connect, nor do I have to create a front bay. There isn't much space for that in front anyway.


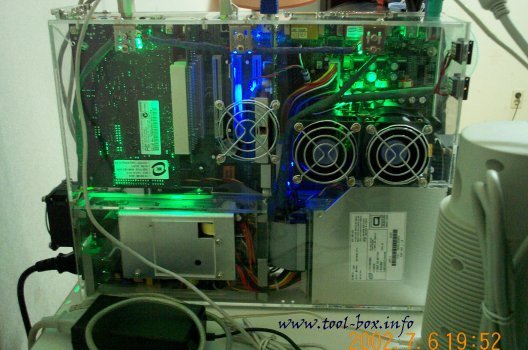
The view from the side. The LED lights liven up the mood of the computer system effectively, with distinctive green-blue-green spotlights. I think it looks far better than using the neon light tubes, which was the initial plan.

The Second Portable Athlon (8/10)


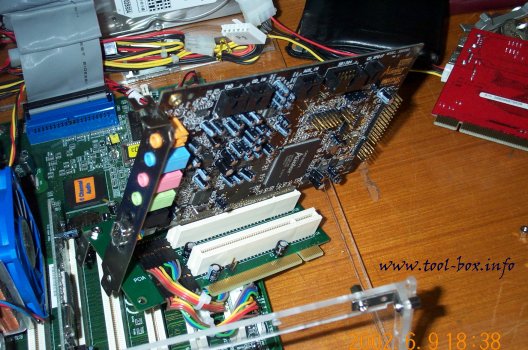
By using a PCI riser card, I was able to put three PCI expansion cards in addition to the PCI LAN card next to the video card, for a total of four possible PCI expansion cards in the system. The original Portable Athlon system had PCI slots occupied by the power supply, so this is a great improvement, and now I became free from reliance of on-board subsystems. Here is a picture of Sound Blaster Audigy sound card on the PCI riser card after it was separated from the mainboard.


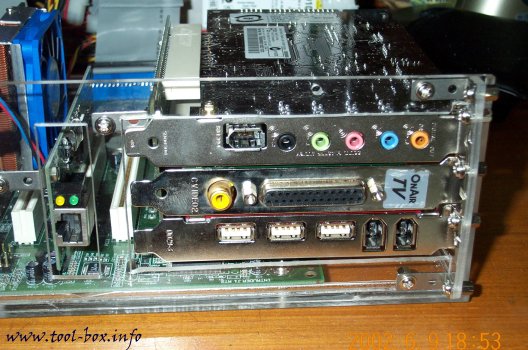
This is how it looks like when all four possible PCI slots are occupied. Three cards on the PCI riser card comfortably fit into the space. The cards are secured into place by bolts and/or L-shape brackets. The leftmost card is the 100Mbps Ethernet LAN card, and the cards on the riser are SB Audigy sound card, OnAir TV II television card, and FireWire-USB2.0 combo card, from top to bottom. The television card was temporarily installed for watching FIFA World Cup 2002 Korea/Japan broadcasts.


Monitoring ambient air temperature is necessary to properly measure and predict the performance characteristics of the air-cooling system. It's like measuring the water temperature at the radiator or reservoir in the water-cooling system. I attached the temperature sensor on the air hole above the CPU cooler, so that I can see what the exact temperature of the air the CPU cooler is taking in. This way I can properly measure the temperature delta of the cooler and predict how much temperature change was occurred in various clockspeed settings. The measured temperature is visible from the front of the case via the LCD readout, seen at the rightmost side of the picture.

Copyright (C) 1996-2024 Woo-Duk Chung (Wesley Woo-Duk Hwang-Chung). All rights reserved.