Wearable Computing Project translated

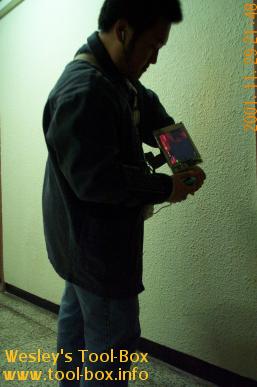
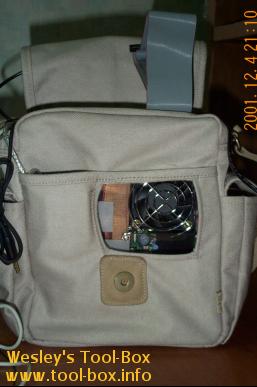
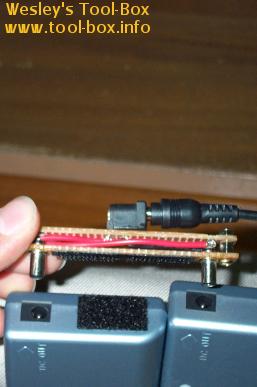
The Wearable Computing Project, which has been getting a lot of attention since it was introduced in the December issue of I Love PC, has been completely translated to Korean. Other translations are on hold; I have finals to prepare. -_-;

This entry was originally in Korean only. -July 2005

Site Design Changes

The much needed revamp of the site design has finally been done! The 5-year-old design that had been around since the very beginning of the site was deemed too archaic. There has also been a name change; this site is now called 'Wesley's Tool-Box' instead of 'Wesley's Computer Hardware Zone' to reflect the change in domain name. Meanwhile, http://wdsoftware.lab.cc URL no longer works, so use the new domain name. The Korean translations have not been finished, so please wait. Currently, only the two first articles that had already been translated have been moved to here.

This entry was originally in Korean only. -July 2005

The Wearable Computing Project!

The long-awaited article on Wesley's newest project, 'Wearable Computing Project', is now online. This 3-month project that challenges the common notion of how a computer should be used had been randomly introduced as pictures to some of the people while the project was being in progress, but now everyone can see it! This is part 1, so don't forget to come back after reading it!

Wearable Computing Project (10/10)


In the order of left-to-right, top-to-bottom fashion, I've illustrated how my wearable computer is being worn and operated.
Wearable #1 Wearable #2
1. The wearable computer is casually worn on the left side of the body. I've found out that practically no one suspects this as a computer.
2. To use, the monitor is first taken out and the straps are extended out so that it could be used to attach the monitor to the left arm.
Wearable #3 Wearable #4
3. This is how it looks with the monitor attached to the left arm.
4. Now the keyboard is taken out and put on the right arm.
Wearable #5 Wearable #6
5. Now the computer is ready to use! The power button on the system is pushed to boot. 6. Quake 3 Team Arena is being played on the system. The keys were reconfigured to work better on the HalfKeyboard.

 This concludes the part one of the Wearable Computing Project. Stay tuned for Part 2, where the computer gets more functionality, and runs through benchmarks as well. You are wondering how good a framerate this unit pumps out since I'm playing Quake 3 on it? :-)

Wearable Computing Project (9/10)


Now I can show you the individual close-ups of the system. They are not the current look, as they will be shown in the Part 2 of this article later on since it is more relevant there. First, the main system, comfortably enclosed within a modified tote bag.
The overall look of the main system This is how it looks when the cover is open

The whole thing measures a bit longer than 20cm either way. The picture on the left shows how the system looks like when not in use. Notice that there are two battery packs, as mentioned earlier. The unit weighs approximately 2.5kg. The battery pack and the system is responsible for nearly half of the weight, each. The picture on the right shows what happens if I decide to use it. I've made a ventilation hole so that the CPU doesn't suffocate and overheat. You can see the monitor cable sticking out at the top, which resembles a casual IDE data cable. It's actually narrower than that, but due to the tight pin-out, it has 44 wires. You could say it's mechanically (not electrically) compatible with the 2.5" hard disk's IDE cable.
The battery connector The input devices of the wearable

On the left, you can see how the power supply receives power from the batteries. I've made a small circuit that harness the power from the batteries and combine them in serial fashion, sending 30V DC to the power supply. On the right, the input devices were taken out for a showing. The trackball is loaded into the left side pocket, while keyboard goes into the right side one. The earphones are housed in a case that's attached on the flap of the left side pocket. The case is detachable because it is attached via Velcro. Now let's see how it looks like when I wear it.

Copyright (C) 1996-2024 Woo-Duk Chung (Wesley Woo-Duk Hwang-Chung). All rights reserved.