The Heatpipe Mod on XPPort-II (6/11)


Video card installed into the system

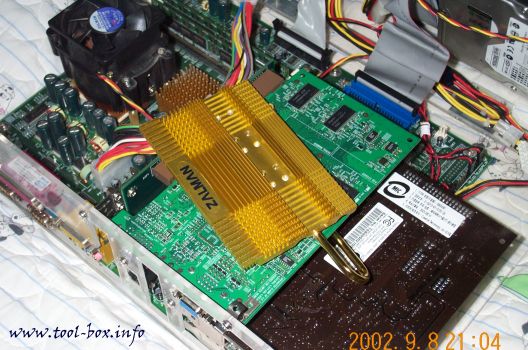
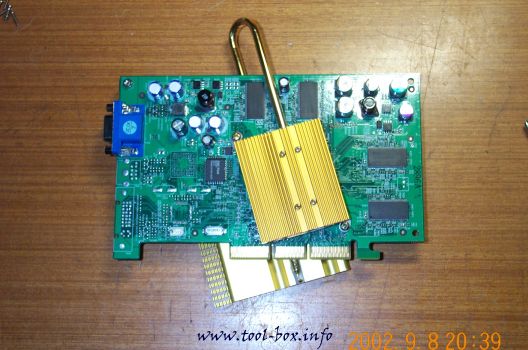
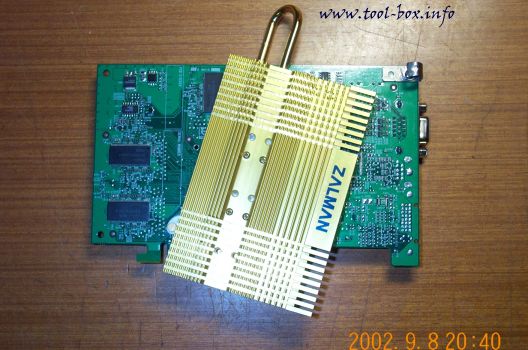
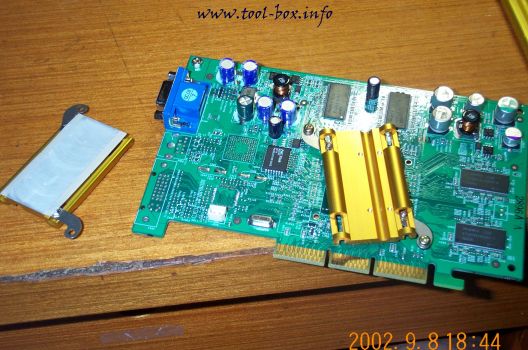
But this is no standard system at all. Because of the AGP riser that the video card plugs into, the heatsink can extend beyond the AGP slot without much trouble. Sure, it looks a bit unusual, but does it really matter if it works anyway? :-)

The system in operation with the new cooler

To help cooling the video card's GPU, I've added a 60mm fan on the case. To keep the noise level to the comfortable level, this fan was also set to operate at 5V. I noticed that this fan made a faint scratching noise occasionally, so I replaced it with the stock fan that came with the heatsink that came with the AthlonXP CPU I bought for this system later on. We're not done here. Read on.

The Heatpipe Mod on XPPort-II (5/11)


After the heatpipe is inserted into the heatsink bases, the last step I needed to do is place the appropriate heatsink on each side and fasten it with bolts. Again, I needed to apply the contact points with sufficient amount of thermal paste so that heat can be seamlessly transferred to and from the heatpipe for effective thermal dissipation.

Front side of the video card

This is how the front side of the video card looks after the installation. This small heatsink is the standard front side heatsink for ZM50-HP model, and if it were not for the heatpipe linking to another heatsink at the back, it would have been completely insufficient for cooling the GF4 Ti4200 core that lied beneath it.

Back side of the video card

Flip the video card and you see this. The huge heatsink here is the aforementioned standard back side heatsink for ZM80-HP model, and thanks to the heatpipe most of the heat dissipation happens here without overloading the front side heatsink. You may wonder how this card can actually be plugged into the system without problems since the heatsink obviously extends beyond the AGP port connector. It's true that this card cannot be installed on a standard system...

The Heatpipe Mod on XPPort-II (4/11)


The heatsink bases are installed

The heatsink bases were assembled on both sides using the bolts, rubber standoffs, and nuts that are provided with the heatpipe cooler package. You'll notice the groove that is present on the heatsink base. This is where the heatpipe is supposed to make a clean contact with, in order for it to transfer heat between the heatsinks properly.

The heatpipe is inserted between the bases

The heatpipe was now inserted on the heatsink bases. For efficient heat transfer, thermal paste was spread around the areas that got in contact with the heatpipe. One of the obstacles in installing the heatpipe was the capacitor that was sticking out at the top middle of the circuit. As you can see in the picture, the heatpipe narrowly avoids it and makes a safe round around the video card.

The Heatpipe Mod on XPPort-II (3/11)


I opened the package and laid out the parts that were necessary. You might notice that there are more than enough parts to make two heatpipe systems, and you've seen it right. I will only be using a part of these components for the video card cooling. What are the other parts for? You'll eventually find out.

All the parts are gathered

Due to the height restraints of my system, I needed to mill down the heatsink bases by about 1mm. Normally, the whole heatsink base should be coloured yellow, but as you can see in the top left side of the picture above, that is no longer the case.

Installing the heatsink base

Also, the heatpipes cannot be laid down in the length direction of the video card as it would normally be preferred (see here). This is because the right hand edge of the video card would come in near-direct contact with the power supply module in my system, leaving absolutely no room for heatpipes to go around. So I had to make the heatpipe go around the top part of the video card, where there would be sufficient room. This is why the heatsink base would be installed in a strange way as you can see in this picture.

The Heatpipe Mod on XPPort-II (2/11)


That would've been the end of the story, had it not been for the annoyingly large amount of heat pouring out from the stock heatsink installed on the GF4. The heatsink was quite hot even when running at normal speeds, which was worrying me. Furthermore, the 50mm fan installed on the heatsink made a noticeable whine, running at 12V, which was disturbing since all my system fans were running at 5V, low-noise operation. The stock heatsink had to be dealt with. Then I remembered that Zalman Tech had a new video card heatsink they wanted me to test out.

Zalman ZM50-HP cooler package

The ZM50-HP video card cooler is unlike any previous coolers Zalman had created to date. It does not have their trademark 'flower heatsink' design, while it showcases one of the newer cooling technologies known as heatpipes. A heatpipe, simply to put, is sort of a 'superconductor' in terms of thermal aspects. It can transfer heat from one end of a foot-long pipe to the other end in a matter of a couple of seconds, which is at least tens of times faster than what you can expect with a solid tube made of copper, one of the most thermally conductive elements.

The heatpipes here are used as a quick heat transport between the multiple heatsinks in the heatpipe-linked cooling system. This means that the heat generated from the heat souce (i.e. video card's GPU) is quickly and evenly moved to all the heatsinks on the heatpipe, so the effective heat dissipation area is effectively increased, no matter how far apart they may be. In contrast, a conventional heatsink cooling system will have the heat concentrated near the heat source and thus the heatsink fins farther away from the heatsink would not be as effective in dissipating the heat compared to the ones near the heat source. You can clearly see that the heatpipe can greatly enhance the cooling performance when properly integrated to a cooling system.

Bigger heatsinks for better cooling

The ZM50-HP model, however, is targeted at budget-level video cards with relatively low heat output. For a higher performance video card like the GF4Ti card I now have in my system, I need to use a bigger heatsink. This is why I will use a heatsink from the ZM80-HP model. This model originally comes with two massive heatsinks that is almost as big as a GF4Ti card itself. You can see one of these in a picture above. I can only use this huge heatsink on the back side of the video card because the front side does not have enough room. So my personal video card cooler will be a mix of the ZM50-HP and ZM80-HP models. In addition to this, I bought some old heatsinks made for cooling classic Pentium processors that I would cut up to use as ramsinks (heatsinks for memory chips).

Copyright (C) 1996-2025 Woo-Duk Chung (Wesley Woo-Duk Hwang-Chung). All rights reserved.