Building LCD Monitor (1/9)


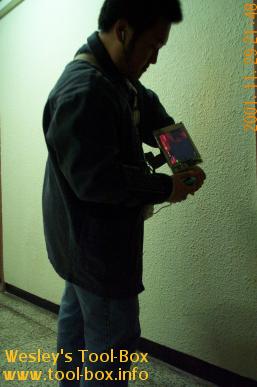
Since the introduction of my wearable computer, many folks have asked about the workings behind it. One part of the particular interest was the display that I've made that could be strapped on the left arm. The focus was on how I could be building a monitor from ground up, because a computer monitor is one of the peripherals that most people just buy it pre-assembled, and never give a thought about assembling one themselves. This is in spite of the fact that many people assemble the main system personally nowadays - monitor is just a wholly-bought product by default to the general minds.
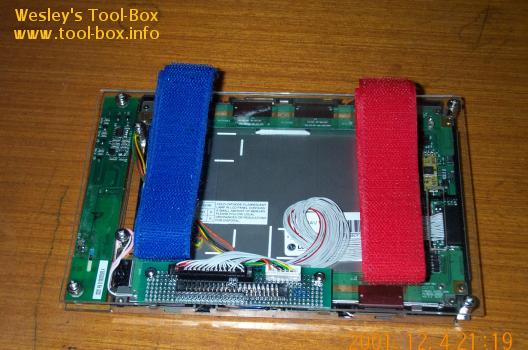
The Strap-on Display Unit from the Wearable Computer

But now that it was apparent that one can build a display by themselves, a new world of possibilities opened up - one can now flexibly utilize the display unit to fit their needs, just like how one assembles the main computer unit. Still, many factors were uncertain in regards to the actual assembly of the display, and this promptly aroused the requests for an article explaining what one needs to do to make a display for oneself. And so I present this article to you.

Currently, the most common form of computer display is CRT (Cathode Ray Tube), the bulky picture-displaying vacuum tube. This is because CRT had been around since day one of the computer monitors, and is cheaper than any other displays. So some of the audience might wan to build a CRT monitor. However, I would not cover this, because of some reasons. First of all, the picture tube's bulkiness limits the flexibility of the application, and adds considerable weight. Next, the huge electromagnetic coils and electron guns behind the tube is sensitive and hazardous to deal with.

Instead, I will look into building an LCD monitor. LCD is lightweight, thin, and easy to handle, so it's more flexible in application. This is in direct opposition to the CRT. LCD display itself is mostly semiconductor electronics with liquid crystal component, meaning that there is far less hazard present. If you discount the backlight, there will be negligible electromagnetic radiation - another contrasting difference. Finally, LCD displays consume far less energy, so it's automatically environmentally friendly. :-) Price is still a concern, though.

Wearable Computing Project (10/10)


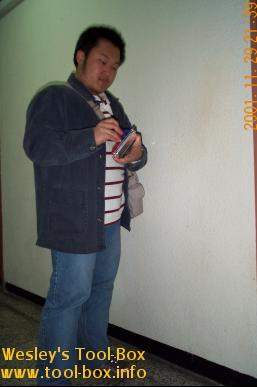
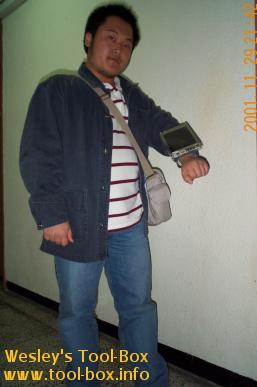
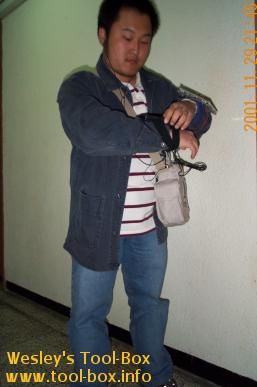
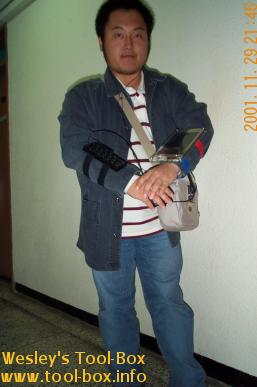
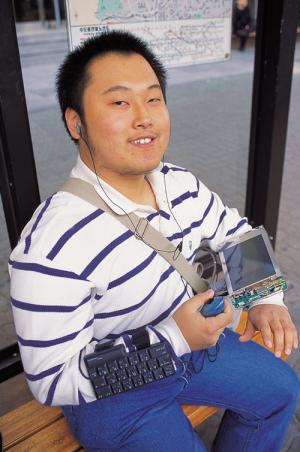
In the order of left-to-right, top-to-bottom fashion, I've illustrated how my wearable computer is being worn and operated.
Wearable #1 Wearable #2
1. The wearable computer is casually worn on the left side of the body. I've found out that practically no one suspects this as a computer.
2. To use, the monitor is first taken out and the straps are extended out so that it could be used to attach the monitor to the left arm.
Wearable #3 Wearable #4
3. This is how it looks with the monitor attached to the left arm.
4. Now the keyboard is taken out and put on the right arm.
Wearable #5 Wearable #6
5. Now the computer is ready to use! The power button on the system is pushed to boot. 6. Quake 3 Team Arena is being played on the system. The keys were reconfigured to work better on the HalfKeyboard.

 This concludes the part one of the Wearable Computing Project. Stay tuned for Part 2, where the computer gets more functionality, and runs through benchmarks as well. You are wondering how good a framerate this unit pumps out since I'm playing Quake 3 on it? :-)

Wearable Computing Project (9/10)


Now I can show you the individual close-ups of the system. They are not the current look, as they will be shown in the Part 2 of this article later on since it is more relevant there. First, the main system, comfortably enclosed within a modified tote bag.
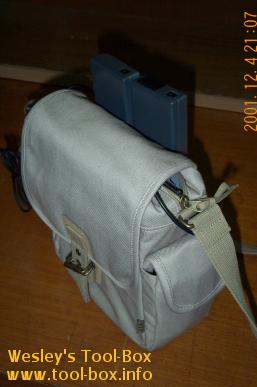
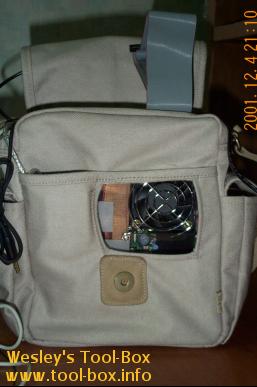
The overall look of the main system This is how it looks when the cover is open

The whole thing measures a bit longer than 20cm either way. The picture on the left shows how the system looks like when not in use. Notice that there are two battery packs, as mentioned earlier. The unit weighs approximately 2.5kg. The battery pack and the system is responsible for nearly half of the weight, each. The picture on the right shows what happens if I decide to use it. I've made a ventilation hole so that the CPU doesn't suffocate and overheat. You can see the monitor cable sticking out at the top, which resembles a casual IDE data cable. It's actually narrower than that, but due to the tight pin-out, it has 44 wires. You could say it's mechanically (not electrically) compatible with the 2.5" hard disk's IDE cable.
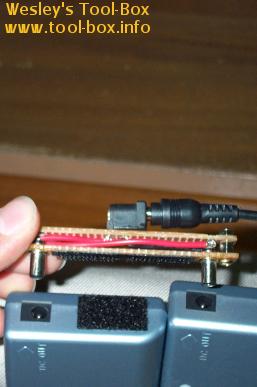
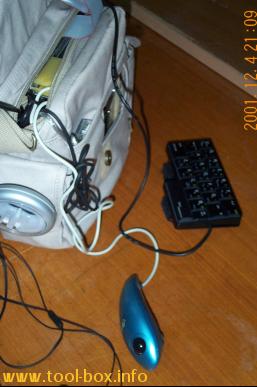
The battery connector The input devices of the wearable

On the left, you can see how the power supply receives power from the batteries. I've made a small circuit that harness the power from the batteries and combine them in serial fashion, sending 30V DC to the power supply. On the right, the input devices were taken out for a showing. The trackball is loaded into the left side pocket, while keyboard goes into the right side one. The earphones are housed in a case that's attached on the flap of the left side pocket. The case is detachable because it is attached via Velcro. Now let's see how it looks like when I wear it.

Wearable Computing Project (8/10)


Posing for a magazine photographer while wearing the wearable computer. Photo courtesy of I Love PC.

Because 'I Love PC' wanted to have my wearable PC introduced in their next issue (December 2001), I quickly attached leather straps on the monitor and bought a small totebag to put my system in. The above picture is the actual photo that went into print in the said issue of the magazine. This marks my second entry in their 'Computer Freaks' section; first one was, of course, the Portable Athlon, which was shown in the May 2001 issue.

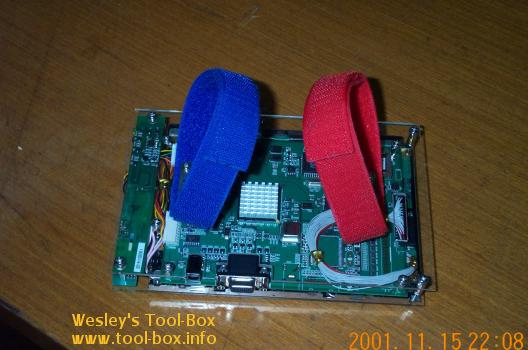
While the quick-fix proved to be stable enough for the duration of the photo shoot, I noticed that some improvements were in order. Most notably, the display was bulky as expected and the leather straps proved to be uncomfortable. I couldn't do anything about the bulky part, as it was mainly attributed to the ADC attached to the back, but I decided to replace the strap with a Velcro type. It proved to be a lot better and reduced weight, slightly alleviating the bulkiness.

Velcro straps on the monitor

Good news came from Maxan a day after this. They notified me that the BIOS fixing the compatibility issue with my LCD panel had been finished. This meant that I could dump the ADC! I rushed to their office (which had been moved to downtown Seoul, making it easily accessible from subway) and replaced the BIOS chip. They did not have BIOS flashing procedures like some of you are used to, apparently.

I removed the ADC from the monitor, and attached the conversion interface instead, so the monitor and the motherboard would have a direct digital data link like a laptop. I really liked this, because not only did it reduce the thickness (and thus the bulky look) back to the original design, it reduced weight, increasing comfort level. The thickness of the panel itself is now about 1cm thick.

The LCD monitor without the ADC.

Wearable Computing Project (7/10)


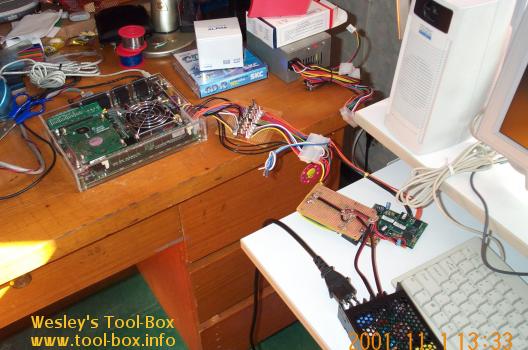
Initial testing of the newly created power supply

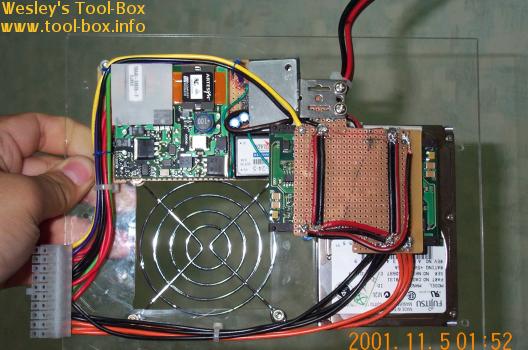
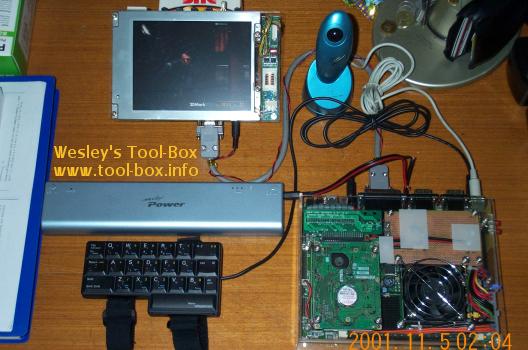
Due to the relatively low power requirements of the system as confirmed by an ATX circuit load measurement device I created (shown in the middle between the system and the power supply) the designed maximum of the power supply (3.3V - 20W, 5V - 40W, 12V - 20W) was not strained, as expected. The software controlling of the power worked as designed, and the output power was stable, observing no operational anomalies. In other words, it worked perfectly! Time to integrate it into the system.

The power supply is attached to the cover of the system

At first, the power supply did not operate properly when put into the system. I've isolated the problem to be an unintended short-circuiting created by the hard disk. So I took some extra precaution and applied non-conductive film where the electrical components might touch each other. No problems occurred thereafter, thankfully.

Now that the power supply is in, I needed a battery to operate the system so that I wouldn't need external power when I wear it around. At this point, Mr. Yang, a reporter of I Love PC (yes, that company who lent me a space in the exhibition booth), heard about the project and offered to connect me to a manufacturer that produced auxiliary battery power for laptop computers. My power supply had flexible power input range of 18V~32V, so I had hoped that some of their models would fit into this requirements. I was relieved to learn that they had 19V model of their laptop auxiliary battery, 'MobyPower'. I asked for one, and they provided one for free in exchange for some exposure of their product on a magazine (guess which one?).

The system finally runs independently from a battery; it is running 3DMark2001.

As you can see in the picture, the system was now successfully running off a battery... or so I thought initially. A slight problem was encountered in that, while being heavily stressed, the battery's output voltage decreased to an unacceptable level, far below the 18V, which caused my power supply to halt operation. I decided that the solution to the problem was to use two of their 15V models in serial operation so as to prevent any under-voltage situation. They heartily agreed to provide the two 15V battery packs when I returned the 19V model. This indeed solved the problem completely, and I now had a truly full-operational system. Is this the end? Of course not. Remember it was supposed to be 'worn'?

Copyright (C) 1996-2024 Woo-Duk Chung (Wesley Woo-Duk Hwang-Chung). All rights reserved.