Removing stripped collimator screw

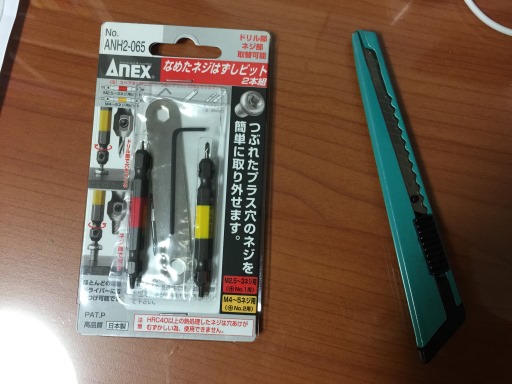
Anex ANH2-065 stripped screw extraction kit

I've mentioned earlier that one of the collimator screws on my Celestron NexStar 6SE telescope was completely stuck, preventing proper calibration. It was so bad that the screw's head became stripped in the attempts to unscrew it, and pliers were of no use, either. To fix this problem, I ordered Anex ANH2-065, a stripped screw extraction kit made in Japan for US$20. It had a lot of favourable reviews, so I thought I might as well try it.

The kit came with two drill bits, one for working with 2.5 to 3mm screws (red) and the other, 4 to 5mm screws (yellow). One end of each bit is used for drilling a small hole in the middle of the screw and the other end is a reverse-threaded tap that gets inserted into this hole. As you turn the bit counter-clockwise, the tap burrows into the screw. Eventually, the screw is supposed to turn with it and come out.
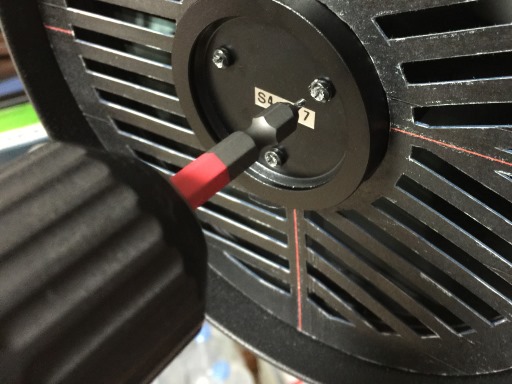
Insert the drill bit into stripped screw

NexStar 6SE's collimator screw is the same one used with C6, an M3 (3mm) type with 12mm length, so I got my old cordless drill charged up and inserted the red bit. I set the torque level to low to reduce the risk of damage, and carefully drilled out a tiny hole about 4mm deep into the stuck screw.
Continue reading "Removing stripped collimator screw"

Cleaning iPhone 6 Plus rear(back) camera

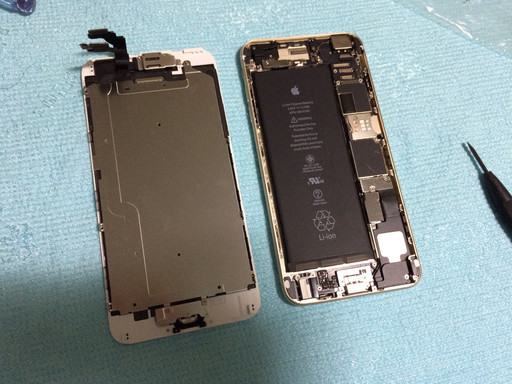
Removing the display assembly is the first step to most iPhone 6 Plus tinkerings

Rear camera on iPhones doesn't seem to have any gaps for dust to get in, but for some reason it gets in on rare occasions. You could take the phone to an authorized service center for either cleaning or refurbishment, or if that's not a viable option like my case, you could do the cleaning yourself.

To do that, you need to first open up the phone and separate the display assembly from the rest of the phone. The cables connecting the two are held by five screws and a cover plate, so once you take them out, the four cables can be popped off with a spudger.

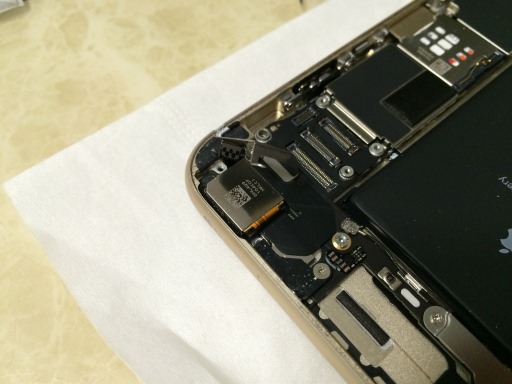
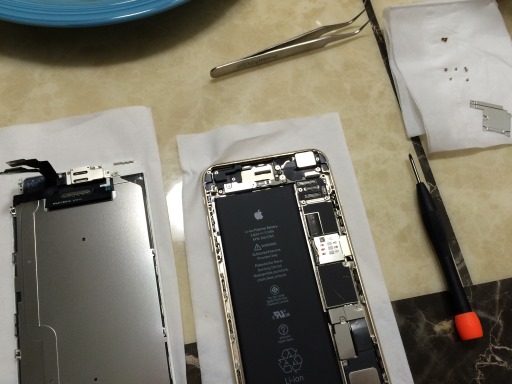
Remove the cover plate to pull out the rear camera

To access the rear (back) camera, you need to remove two screws that hold the cover plate for the camera on the top right area of the phone. The screw on the left is obscured by a black pad, so you need to lift it slightly with something like a flathead screwdriver while you unscrew. The cover plate may not completely become loose, but it does not need to be.
Continue reading "Cleaning iPhone 6 Plus rear(back) camera"

iPhone 6 Plus Touch ID repair

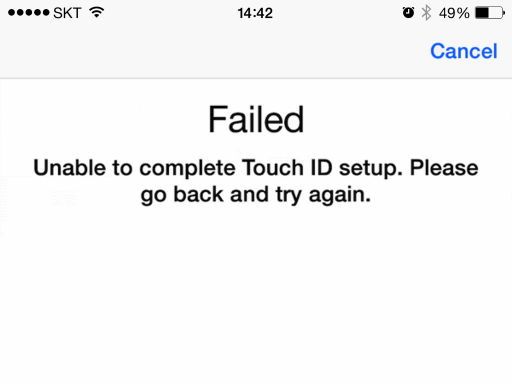
"Failed - Unable to complete Touch ID setup. Please go back and try again."
Touch ID was not working anymore

After replacing the entire display assembly on my iPhone 6 Plus, everything seemed to be okay, except for one thing. The Touch ID sensor was not working for some reason, and it wouldn't respond to my fingerprint touches. The home button itself was working, and I could press it to go back to the home screen or call up the multitasking view.

When I went to the Settings app, Touch ID option was disabled. When I tried to re-enable it, the process immediately failed, showing the above on the screen. Also, the Reachability function that brings the screen area down half way did not work, either. This relied on lightly touching the home button quickly twice, so it must have been recognizing the fingerprint to function.

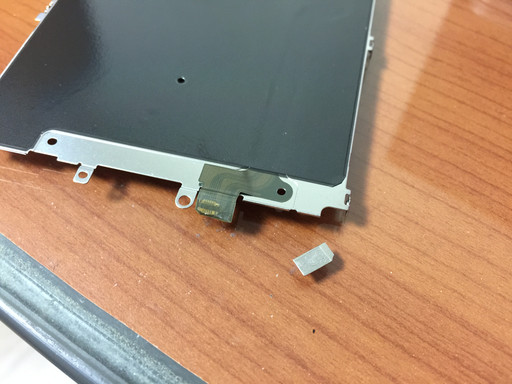
The bottom connector on the Touch ID cable wasn't in good condition

I remembered that the Touch ID cable on the display assembly's shield plate got weak while applying heat to loosen the adhesive. Thinking that maybe the connector was damaged, I ordered some replacement shield plates with the Touch ID cable on them.
Continue reading "iPhone 6 Plus Touch ID repair"

iPhone 6 Plus screen repair (Part 3)

Taking the iPhone 6 Plus display assembly apart

Seeing that the glue can no longer cleanly fix the cracked screen, I decided to order a 3rd party replacement display assembly for my iPhone 6 Plus. Currently, they're pretty expensive - easily fetching more than US$300 with shipping cost extra - and some sellers don't really have them in stock or ask for more money once you pay the listed price. In my case, it took me three tries to get one shipped, paying about $260 for the display and $35 for shipping.

With the replacement in hand, I started disassembling the phone. After removing two pentalobe screws on the bottom and lifting the screen with a suction cup, I was able to easily disconnect the display assembly from the rest of the phone. All I needed to do was to take off the five screws holding the cable bracket, and then carefully disconnect the four cables from the display assembly.

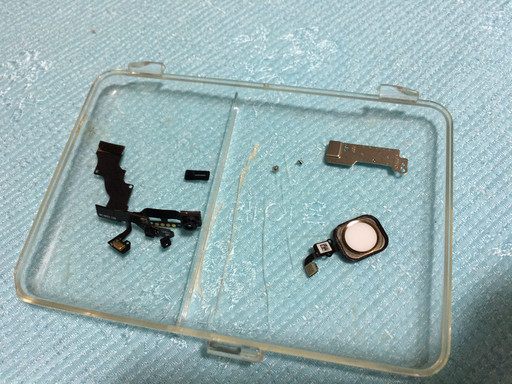
Parts separated from the display assembly

But there were a lot of modules on the display assembly that had to be separated. They did not come with the replacement display, so they had to be re-used. And in the case of the home button, the integrated Touch ID sensor is uniquely paired with the phone and any replacement will not have the fingerprint sensing enabled due to security reasons.

So I carefully removed the earpiece speaker and the front-side camera & sensor assembly on top, and then the home button on the bottom. Where they were stuck using adhesives, I used a heat gun at a setting of 50C (122F) to loosen them.
Continue reading "iPhone 6 Plus screen repair (Part 3)"

Fixing MySQL autostart failure on Yosemite

There's been some DB errors on the website today because there had been reboots and MySQL failed to automatically start each time ever since upgrading to OS X 10.10 Yosemite. I knew of this problem, but since the disruption was starting to get annoying I decided to find a way to fix it. Apparently, the fix goes all the way to 2010 for fixing the same issue in OS X 10.6 Snow Leopard by Marko Tomic. Then a simpler version for Yosemite came up a few weeks ago, which is largely similar to a 2013 entry at Apple Support Communities.

This was happening because MySQL has been using a very old way to autostart the service and never bothered to update it, making it susceptible to failure for several years already. Until there's an official fix, the following should be entered into the Terminal.app, which is essentially creating a plist file for the LaunchDaemon to use on boot.

sudo nano /Library/LaunchDaemons/com.mysql.mysql.plist

Upon entering the "nano" editor, type (or paste) the following lines.

<!--?xml version="1.0" encoding="UTF-8"?-->
<plist version="1.0">
  <dict>
    <key>KeepAlive</key>
    <true />
    <key>Label</key>
    <string>com.mysql.mysqld</string>
    <key>ProgramArguments</key>
    <array>
      <string>/usr/local/mysql/bin/mysqld_safe</string>
      <string>--user=mysql</string>
    </array>        
  </dict>
</plist>

Press Ctrl-O, Enter, then Ctrl-X to save and quit. Then you need to set the file's owner & permissions and load into the LaunchDaemon.

sudo chown root:wheel /Library/LaunchDaemons/com.mysql.mysql.plist
sudo chmod 644 /Library/LaunchDaemons/com.mysql.mysql.plist
sudo launchctl load -w /Library/LaunchDaemons/com.mysql.mysql.plist

Finally, restart the Mac and MySQL should autostart. Remember to restart immediately.
Defined tags for this entry: , ,

Copyright (C) 1996-2024 Woo-Duk Chung (Wesley Woo-Duk Hwang-Chung). All rights reserved.