The only thing that I carry is everything

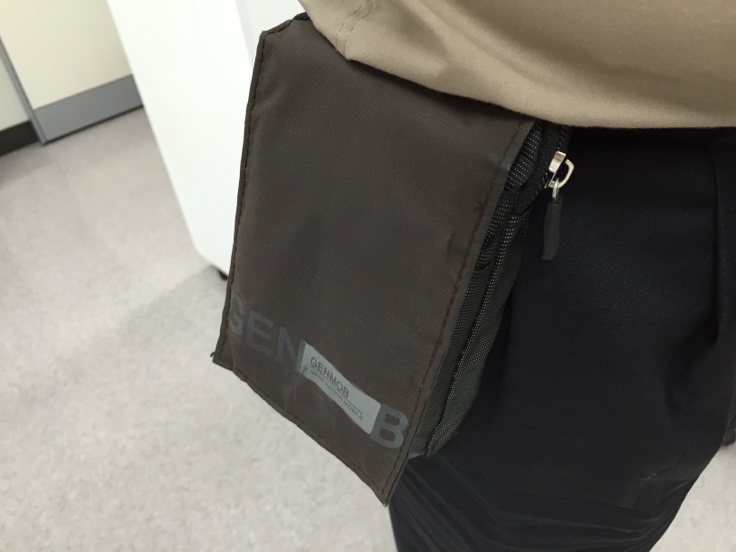
Wearing my all-inclusive belt bag on my waist

Nearly a decade ago, you would have seen me wearing all sorts of gadgets around my waist, as evidenced by this television broadcast. The problem with this was clearly illustrated in that video - it takes a bit of time to put them all on the belt, however useful they may be.

I haven't let go of the carry-them-all attitude, but things have worked in my favour. A lot of the gadgets I had to carry separately were now integrated into a single device (smartphone). That meant less stuff to carry, and I was able to reduce the number of pouches and bags on the belt over the years. I ended up with a phone and an external battery each in a holster, and a bag that held adapters, cables, and other miscellany.

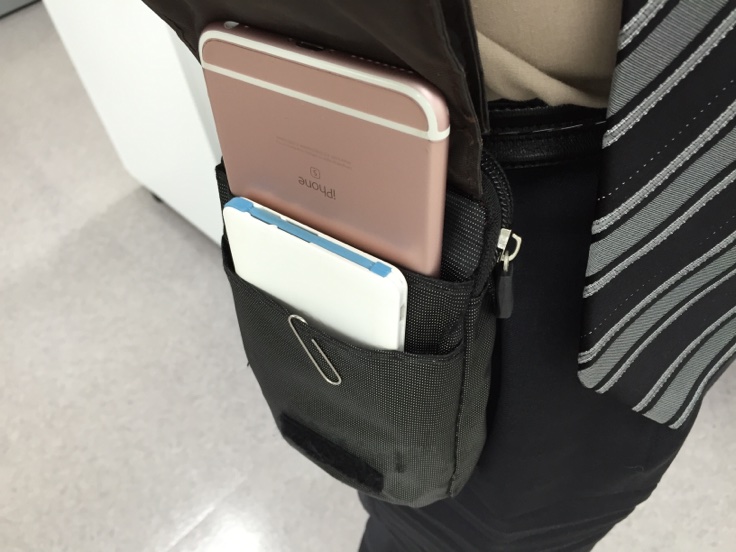
iPhone 6S Plus and external battery are easily accessible

But then large iPhones came along. When I put it on my belt, it occupied a sizable area of my waist. This got me thinking: since the phone is thin enough, maybe I could put it in a belt bag that can store other stuff with it. And this is how I now just have this one bag hanging from my waist.

As you can see here, my iPhone 6S Plus and the slim external battery fit nicely into the front pockets of the bag. They're accessible by opening up the flap usually held in place with a hook-and-loop fastener. I also have a paper clip there in case I need to change the SIM card or poke a reset button.

Of course, there's a lot more hiding behind. Let's take a look at the rear compartment.
Continue reading "The only thing that I carry is everything"

FLIR One 1st gen on iPhone 6S Plus

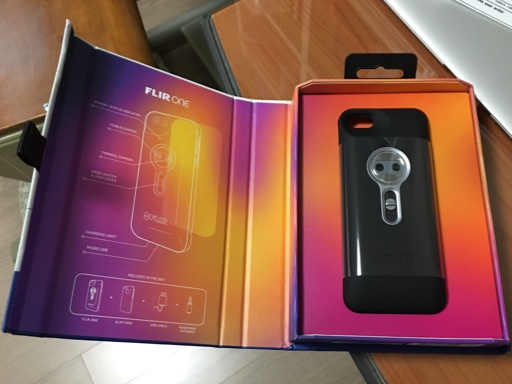
Opening the packaging of the first generation FLIR One

A few months ago, I noticed that the first generation FLIR One thermal imaging module for iPhone 5 & 5S went on a bargain sale online for about US$110. Since the newer version and the competing products were two to three times more expensive I thought it would be a great chance to own a thermal imaging camera of my own and ordered one. Good thing I did, because as of this writing the price went back up so high that you'd be better off getting the newer version.

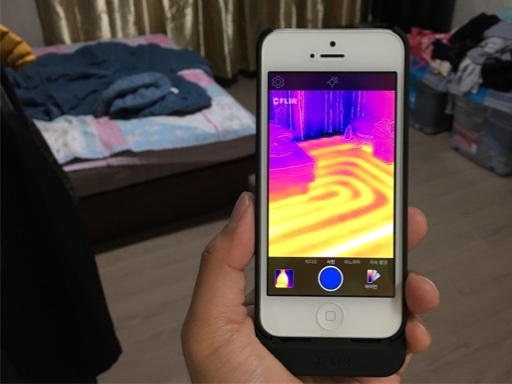
Mine arrived after a couple of weeks and I was already impressed with the nifty packaging. The product itself was also well-built and tightly integrated with my iPhone 5 once I put it into the provided case. Functionally, it works pretty much as advertised. You can see the thermal images of your environment through the phone's screen, with objects' contours enhanced using the images from a regular camera next to the thermal one. This technique, called MSX, is a way of mitigating a relatively low pixel count of the sensor (80 x 60 = 4,800). You have to recalibrate the sensor from time to time using a sliding switch next to it, which is slightly inconvenient at times.

FLIR One works fine with iPhone 5, as intended

Other device specifications limit the use of this module mostly to indoor use. The maximum range is about 30m (100 feet) and can only detect between 0°C to 100°C (32°F - 212°F). It does work quite well if you work within these limits, though. I can see where the heat leaks in my house and whether the floor heating is working properly, to give some examples.

To me, the fact that it works only with iPhone 5 or 5S out of the box was its biggest disadvantage because the larger iPhone 6 and 6 Plus series came out just two months after its official availability. FLIR did address this problem by releasing a second generation model a year later that solved the form factor problem (just plugs into the bottom of a phone) along with an upgraded pixel count (160 x 120 = 19,200) and range (-20°C to 120°C). It also does auto-calibration, boosting its convenience. But what about for those who already own one and upgraded to the newer iPhones?

You could use it on a spare iPhone, like I initially did, or modify it. There are aftermarket phone cases to fit an iPhone 6(S) or 6(S) Plus. But these require you to cut off the curved area to the side of the connector on the module so that they won't interfere with the wider width of these phones. Otherwise, the Lightning connector wouldn't go all the way in. But I did not like to mutilate it like this and decided to find another way.
Continue reading "FLIR One 1st gen on iPhone 6S Plus"

A quirk with SKT VoLTE on iPhone 6 Plus

For the past two weeks, I've been having a strange problem when attempting to place calls with my iPhone 6 Plus. Many of the phone numbers that I know for sure exist would be met with "the number you dialed is not in service". If I switch the "Enable LTE" option in Settings app to "Data Only" instead of "Voice & Data", the phone calls would go through just fine. So it had to be an issue with VoLTE.

I first contacted my carrier, SK Telecom, to see if this was a problem at its end. But nothing turned up and I was eventually advised to contact Apple instead. Sure enough, colleagues using iPhone 6 on the same carrier did not have the problem. Digging deeper, I discovered that the problem did not occur only if I had country code prefix (e.g. +82 for Korea) on the phone number. So while +82-10-xxxx-yyyy would work, 010-xxxx-yyyy wouldn't.

Seeing that it might be some sort of a weird software issue, I contacted Apple support about this. Unfortunately, no clear solution came up, either. As a last resort, I was told to do a complete factory reset and see if that helped. As the troubleshooting was reaching a dead-end, I got a carrier settings update as I opened up the "About" page in Settings app. It updated the carrier settings from SK Telecom 18.x to 19.1. I told the support that I'd see if this update did anything, and if not, I might try the factory reset.

I attempted several calls to various places with the VoLTE setting on, and I saw that all of the calls now made through regardless of the country code prefix. The update apparently fixed the problem. It was indeed a software problem, but it was somewhat caused and fixed by the carrier. I reported this success to Apple support.
Defined tags for this entry: , , , ,

Removing stripped collimator screw

Anex ANH2-065 stripped screw extraction kit

I've mentioned earlier that one of the collimator screws on my Celestron NexStar 6SE telescope was completely stuck, preventing proper calibration. It was so bad that the screw's head became stripped in the attempts to unscrew it, and pliers were of no use, either. To fix this problem, I ordered Anex ANH2-065, a stripped screw extraction kit made in Japan for US$20. It had a lot of favourable reviews, so I thought I might as well try it.

The kit came with two drill bits, one for working with 2.5 to 3mm screws (red) and the other, 4 to 5mm screws (yellow). One end of each bit is used for drilling a small hole in the middle of the screw and the other end is a reverse-threaded tap that gets inserted into this hole. As you turn the bit counter-clockwise, the tap burrows into the screw. Eventually, the screw is supposed to turn with it and come out.

Insert the drill bit into stripped screw

NexStar 6SE's collimator screw is the same one used with C6, an M3 (3mm) type with 12mm length, so I got my old cordless drill charged up and inserted the red bit. I set the torque level to low to reduce the risk of damage, and carefully drilled out a tiny hole about 4mm deep into the stuck screw.
Continue reading "Removing stripped collimator screw"

Cleaning iPhone 6 Plus rear(back) camera

Removing the display assembly is the first step to most iPhone 6 Plus tinkerings

Rear camera on iPhones doesn't seem to have any gaps for dust to get in, but for some reason it gets in on rare occasions. You could take the phone to an authorized service center for either cleaning or refurbishment, or if that's not a viable option like my case, you could do the cleaning yourself.

To do that, you need to first open up the phone and separate the display assembly from the rest of the phone. The cables connecting the two are held by five screws and a cover plate, so once you take them out, the four cables can be popped off with a spudger.

Remove the cover plate to pull out the rear camera

To access the rear (back) camera, you need to remove two screws that hold the cover plate for the camera on the top right area of the phone. The screw on the left is obscured by a black pad, so you need to lift it slightly with something like a flathead screwdriver while you unscrew. The cover plate may not completely become loose, but it does not need to be.
Continue reading "Cleaning iPhone 6 Plus rear(back) camera"

iPhone 6 Plus Touch ID repair

"Failed - Unable to complete Touch ID setup. Please go back and try again."
Touch ID was not working anymore

After replacing the entire display assembly on my iPhone 6 Plus, everything seemed to be okay, except for one thing. The Touch ID sensor was not working for some reason, and it wouldn't respond to my fingerprint touches. The home button itself was working, and I could press it to go back to the home screen or call up the multitasking view.

When I went to the Settings app, Touch ID option was disabled. When I tried to re-enable it, the process immediately failed, showing the above on the screen. Also, the Reachability function that brings the screen area down half way did not work, either. This relied on lightly touching the home button quickly twice, so it must have been recognizing the fingerprint to function.

The bottom connector on the Touch ID cable wasn't in good condition

I remembered that the Touch ID cable on the display assembly's shield plate got weak while applying heat to loosen the adhesive. Thinking that maybe the connector was damaged, I ordered some replacement shield plates with the Touch ID cable on them.
Continue reading "iPhone 6 Plus Touch ID repair"

iPhone 6 Plus screen repair (Part 3)

Taking the iPhone 6 Plus display assembly apart

Seeing that the glue can no longer cleanly fix the cracked screen, I decided to order a 3rd party replacement display assembly for my iPhone 6 Plus. Currently, they're pretty expensive - easily fetching more than US$300 with shipping cost extra - and some sellers don't really have them in stock or ask for more money once you pay the listed price. In my case, it took me three tries to get one shipped, paying about $260 for the display and $35 for shipping.

With the replacement in hand, I started disassembling the phone. After removing two pentalobe screws on the bottom and lifting the screen with a suction cup, I was able to easily disconnect the display assembly from the rest of the phone. All I needed to do was to take off the five screws holding the cable bracket, and then carefully disconnect the four cables from the display assembly.

Parts separated from the display assembly

But there were a lot of modules on the display assembly that had to be separated. They did not come with the replacement display, so they had to be re-used. And in the case of the home button, the integrated Touch ID sensor is uniquely paired with the phone and any replacement will not have the fingerprint sensing enabled due to security reasons.

So I carefully removed the earpiece speaker and the front-side camera & sensor assembly on top, and then the home button on the bottom. Where they were stuck using adhesives, I used a heat gun at a setting of 50C (122F) to loosen them.
Continue reading "iPhone 6 Plus screen repair (Part 3)"

Copyright (C) 1996-2024 Woo-Duk Chung (Wesley Woo-Duk Hwang-Chung). All rights reserved.