Entries tagged as Celestron NexStar 6SE

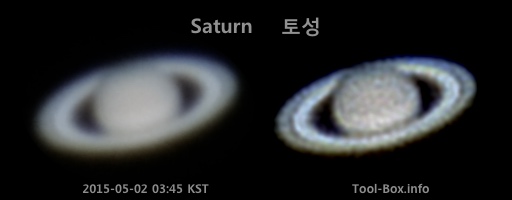
iPhone camera burst mode snaps Saturn

More details become visible in this Saturn shot

Last attempt to photograph Saturn with my iPhone was far from optimal. But the conditions were much better this time and I hoped to get a clearer picture. I had the Snapzoom adapter hold the iPhone 6 Plus on the Celestron telescope and started recording the visuals of Saturn.


Initially, I used the video mode on the default camera app as I've done with Jupiter a few days ago, but I decided to try the burst mode photos as well. I took 400 photos in the span on 40 seconds. The above is the result - it seemed to produce a better result because of the higher data rate. So I used this to produce a composite photo.

After doing the stacking and post-processing, I was able to get the most detailed look of Saturn yet. The Cassini Division came out sharper and the lighter band at the middle of the surface became visible, besting the results from SX50 HS. A more stable atmosphere and a higher quality eyepiece may help even further in the future.

Telescope: Celestron NexStar 6SE + 5mm eyepiece
Device: iPhone 6 Plus (afocal)
Settings: 29mm - ISO 640 - 1/15s - f/2.2
Filters: None
Time: 2015-05-02 03:44-45 KST
Location: Naju, Korea
46 photos stacked with RegiStax 6.1.0.8

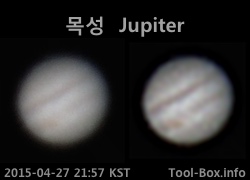
Jupiter photo from iPhone's video shoot

Processed image of Jupiter from an iPhone 6 Plus video recording

Lots of planetary photos from amateur astronomers seem to be derived from a small video camera attached to the telescope. I do have lots of smartphones that could serve a similar purpose, so decided to make use of them instead. Holding it steady in front of the eyepiece was a problem, as evidenced by my earlier attempt, so some sort of an adapter was needed.

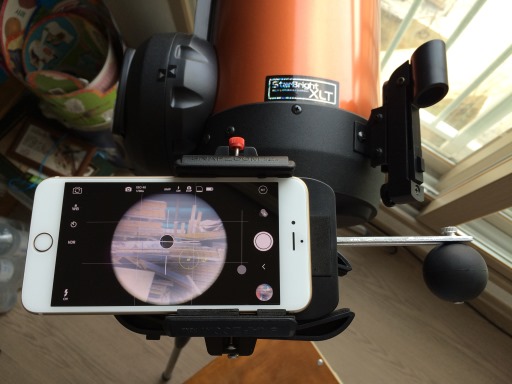
Attaching iPhone 6 Plus to Celestron telescope with Snapzoom adapter

This is where Snapzoom digiscoping adapter came in. I originally bought this several months ago to photograph stars using binoculars, but it could be made to work with telescopes by attaching an included weight. After lots of paddings here and there, my iPhone 6 Plus was able to fit into the adapter and work with the eyepieces that I owned.

Once my NexStar 6SE telescope was aligned with the stars so that I could track any celestial objects, I slid the phone-adapter-eyepiece assembly into the telescope and began looking at Jupiter and the Moon, the biggest targets.


And this is how Jupiter showed up on the screen. The bands and the Great Red Spot were faintly visible, just as I saw with my naked eyes. The shakiness due to the atmospheric turbulence was also quite apparent. I recorded the sight for two minutes and processed the resulting video through PIPP. Finally, the processed video was stacked and sharpened with RegiStax. The final result, as you saw at the beginning, has a more "natural" feel than the ones from SX50 HS for some reason.

Telescope: Celestron NexStar 6SE + 5mm eyepiece
Device: iPhone 6 Plus (afocal)
Settings: 29mm - 1920x1080 - 30fps - f/2.2
Filters: None
Time: 2015-04-27 21:57-59 KST
Location: Naju, Korea
300 frames stacked with RegiStax 6.1.0.8

Big Saturn shots with 5mm eyepiece

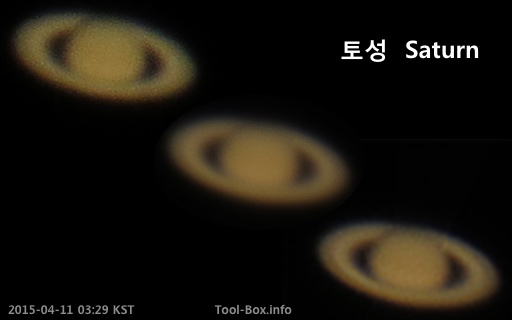
Biggest photos of Saturn from SX50 HS yet
[Raw - Stacked - Wavelet Processed]

Hoping to get a bigger look at the planets, I bought a 5mm LE series eyepiece from e.Frantis. It would supposedly get twice the magnification of the 25mm eyepiece & 2.5x barlow lens combination. After waiting for more than a week for the weather to clear up, I observed the planet Saturn through the brand new eyepiece. It certainly showed the planet nicely, in spite of being a bit dark due to the high magnification.

Not to miss the opportunity to capture this on camera, I got my SX50 HS camera out and placed it over the eyepiece by hand. After several hundred shots, I was able to recover a handful of good photos. Putting them together, I was able to finally have the Cassini Division on the rings of Saturn properly show up. This fulfilled one of the main expectations I had of the Celestron NexStar 6SE telescope.

As for the actual magnification of the eyepiece, my calculations showed that the photos had a 0.22 arc second / pixel resolution, which is about 6.65 times better than the 50x zoom provided by SX50 HS's integrated lens. This is equivalent to having a 8000mm zoom lens. Also, this is 2.4 times the magnification given by the aforementioned eyepiece-barlow lens combo. This is somewhat higher than expected.

Telescope: Celestron NexStar 6SE + 5mm eyepiece
Device: Canon SX50 HS (afocal)
Settings: 24mm - ISO 200 - 1/5s - f/3.4
Filters: None
Time: 2015-04-27 03:16-03:29 KST
Location: Naju, Korea
23 photos stacked with RegiStax 6.1.0.8

First good Jupiter shots from NexStar 6SE

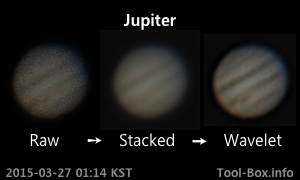
Getting sharper image of Jupiter from SX50 HS without using integrated zoom

After fixing the collimator screw problem, I spent some time getting my Celestron NexStar 6SE properly collimated. To see if this improved the sights, I pointed the telescope to Jupiter. Sure enough, I could see the details of the clouds on the surface much better. I could even make out the Great Red Spot.

I wanted to capture this on camera, so I attached my Canon EOS 450D DSLR directly to the telescope tube for some prime focus astrophotography. But for reasons I still haven't figured out yet, the photos couldn't resolve any details - the planet was just a yellowish disc. I'd have to take photos of the Moon to see what's going on in the coming days.

Still, I didn't want to waste a good sighting opportunity, so I pulled out my usual astrophotography gear, SX50 HS, and took the photos of Jupiter through the eyepiece and the barlow lens attached to the Celestron NexStar 6SE without using the optical zoom. This yielded a pretty good result, especially considering that I just held the camera up the eyepiece by hand. The disc is also about 2.75 times the diameter compared to what would've been possible with the camera's integrated 50x zoom (0.53 vs. 1.46 arc seconds).

Telescope: Celestron NexStar 6SE + 25mm eyepiece + 2.5x barlow
Device: Canon SX50 HS (afocal)
Settings: 24mm - ISO 80 - 1/80s - f/3.4
Filters: None
Time: 2015-03-27 01:14 KST
Location: Naju, Korea

Removing stripped collimator screw

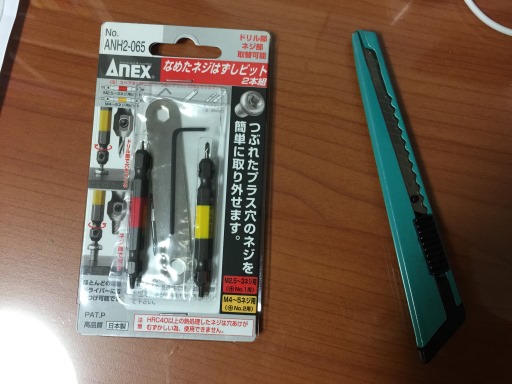
Anex ANH2-065 stripped screw extraction kit

I've mentioned earlier that one of the collimator screws on my Celestron NexStar 6SE telescope was completely stuck, preventing proper calibration. It was so bad that the screw's head became stripped in the attempts to unscrew it, and pliers were of no use, either. To fix this problem, I ordered Anex ANH2-065, a stripped screw extraction kit made in Japan for US$20. It had a lot of favourable reviews, so I thought I might as well try it.

The kit came with two drill bits, one for working with 2.5 to 3mm screws (red) and the other, 4 to 5mm screws (yellow). One end of each bit is used for drilling a small hole in the middle of the screw and the other end is a reverse-threaded tap that gets inserted into this hole. As you turn the bit counter-clockwise, the tap burrows into the screw. Eventually, the screw is supposed to turn with it and come out.

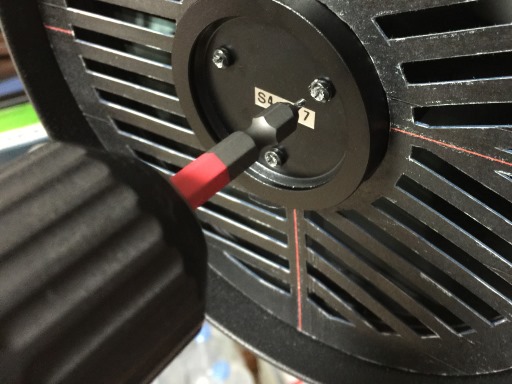
Insert the drill bit into stripped screw

NexStar 6SE's collimator screw is the same one used with C6, an M3 (3mm) type with 12mm length, so I got my old cordless drill charged up and inserted the red bit. I set the torque level to low to reduce the risk of damage, and carefully drilled out a tiny hole about 4mm deep into the stuck screw.
Continue reading "Removing stripped collimator screw"

Copyright (C) 1996-2024 Woo-Duk Chung (Wesley Woo-Duk Hwang-Chung). All rights reserved.