Entries tagged as smart meter

Tracking down electricity draw (Part 2)

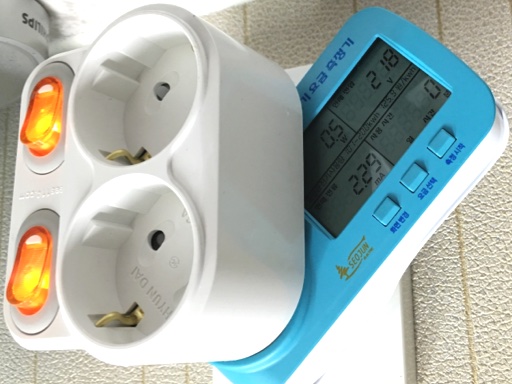
Those lights on the power strips do consume power - two for about 0.5W

As it is the case with the houses these days, there are lots of electronic devices littered throughout my home, plugged into wall outlets and USB ports. Measuring how much power these consume in their active and idle states would provide a good starting point in how to cut off unnecessary use of electricity. So that's exactly what I did over several days, and the results from the living room and computer/network equipment are now in. I'll be looking at other appliances as chances allow later on.

I tabulated the full results at the end of this post. But first, I'll talk about some interesting observations worth mentioning.

1. Beware of Light-Embedded Switches on the Power Strips

The lights on the switches of the power strips consume as much power as the devices capable of efficient standby - about 0.2 to 0.25W. This seems excessive for an LED, so I did a bit of searching. It turns out that most of these switches use neon lamps because the operating voltage is around 90V, making it relatively easy to integrate into 220V power using a simple resistor. With a nominal operating current of 1mA, the whole neon lamp + resistor assembly would consume 0.22W = 220V x 1mA.

LEDs, on the other hand, operate around 2 to 3V at 15 to 20mA, being about twice as efficient (neon: 90V x 1mA = 90mW, LED: 3V x 15mA = 45mW). But if you use a resistor to meet the voltage requirement, it would end up wasting much more energy (neon: 130V x 1mA = 130mW, LED: 217V x 15mA = 3,255mW). So you need a power converter instead, but they are neither as cheap or small as a tiny resistor. It's easy to see why neon lamps won out.

If your goal is to waste as little as possible, you would need to avoid having these lights on all the time. If six of these switches are always on, it would equate to about 1.3W, or about 1kWh per month of wasted energy. This is something to keep in mind when choosing a power strip for use in a room. If most of the stuff are used all the time or the standby power is low, it would be better to use a simpler power strip.
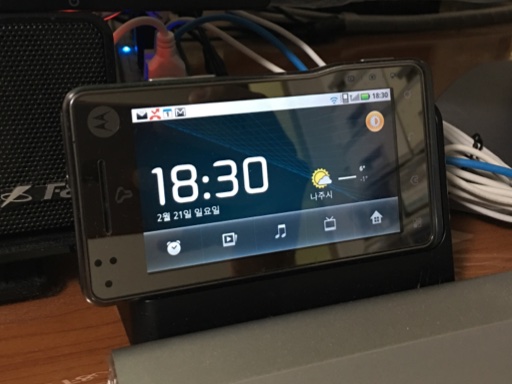
Docked smartphone as a desk clock isn't energy efficient - even if it's fully charged

2. Fully Charged Devices Still Leech Power

There are lots of handheld devices out there, and many of them are conveniently charged when placed on a dock. The problem is that even when the device is finished charging, the charging circuit still draws some power to keep the battery topped off.

For one thing, my electric shaver was found to be sitting idle and sipping nearly 1W for several hours even after being fully charged. Considering that it only takes a few minutes at most to get back to full after a shaving session, this seems to be an unneeded waste. I've changed my usage pattern so that I charge the shaver once every other week or so, and cut the power to the charger once I see that it's done its job.

Then there's the Motoroi smartphone that I've been keeping around its vertical dock as a desktop clock for about five years ever since it was no longer my main phone. The measurement showed that, even though it's kept fully charged, it was drawing about 1.2W from the USB hub all the time because the screen was always on. Like the power strip lights, this is enough to affect the last digit of my monthly electricity usage. So I decided to retire the old phone and replace it with a normal digital clock.

Similar to what was going on with Motoroi and the shaver, smartphones plugged into the dock were also found to sip a bit of power after a full charge. Unplugging it after charging seems to be the "smart" thing to do.
Continue reading "Tracking down electricity draw (Part 2)"

Tracking down electricity draw (Part 1)

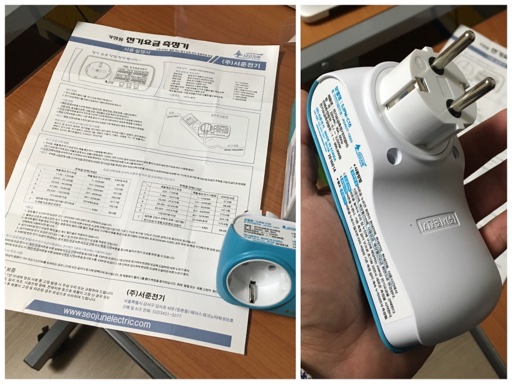
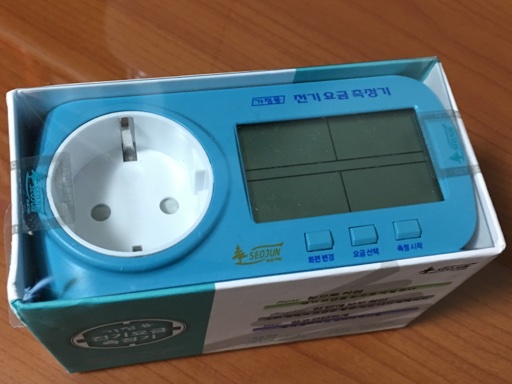
Seojun Electric's household plug-in electricity monitor

The smart meter I installed last month is running nicely, but using it to measure a precise power consumption of an individual appliance is cumbersome as you need to have everything else stable. So it was time for me to invest in a plug-in type electricity monitor. After some comparing, the one from by the company that made the smart meter was deemed most practical. Named SJPM-C16, it cost me about US$18.50 (KRW 22,400) after discounts.

The goal of this sort of electricity monitor is not just about informing you of electricity usage, but also getting you some ideas on how to make savings from such info. Considering this, I liked the way it was packaged. It was pretty compact and minimal, with hardly any waste of space or materials.

It comes with a large 1-page manual and is about the size of a compact camera

Even the manual is a neatly-folded single sheet of paper that lists everything that you need to know when using the product. This includes the fact that South Korea has a bizarre 6-tier exponential residential pricing for the retail electricity, and that this monitor fully accounts for this when calculating the costs. You can also configure for other pricing schemes and the tier prices themselves are also adjustable, making it useful even if there are future changes.

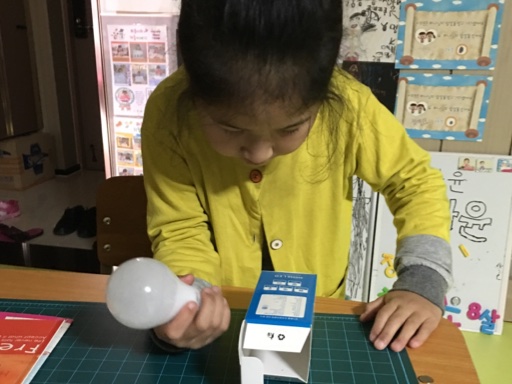
Now armed with this capable tool, I set out to check the power consumption of every appliances and devices scattered throughout the house.
Continue reading "Tracking down electricity draw (Part 1)"

Now switching light bulbs to LED

So we're getting LED bulbs, too?

After successfully deploying LED lamps across the FPL lamp fixtures, I thought that the lamps installed in the traditional screw-in sockets should be replaced as well. Ever since these lamps started to go mainstream about 5 years ago, the price kept dropping and the choices kept on growing. This meant that it was a good time to make the move.

Comparing the various offerings on the market, I ultimately settled on the BEAM series of lightbulbs from Sigma LED (formerly Sunsea). They were among the brightest for the rated power, yet priced competitively. Both the 8W and 10W versions cost me about US$3.75 (KRW 4,500) per bulb.

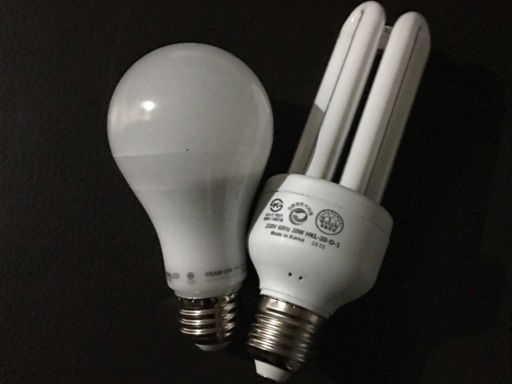
The new versus the not-so-old lightbulbs: Sigma LED and Hankuk CFL

They were set to replace the 20W compact fluorescent (CFL) bulbs made by Hankuk Lighting and installed throughout the house by default. Here is how they compare.

Name Type Dim. (mm) Power (W) Lum.Flux (lm)
Hankuk HKL-20-D-1 CFL E26 54⌀ x 161 20 1220
Sigma BEAM-10W LED E26 65⌀ x 122 10 1024
Sigma BEAM-8W LED E26 60⌀ x 108 8 744

The LED bulbs are shaped closer to the traditional incandescent bulbs, making them thicker and shorter than the CFL ones. Because of the larger diameter, some of the fixtures that were designed only with the CFL in mind may have trouble taking in the 10W ones. This is why I got 8W ones as a fallback.

Meanwhile, the spec comparison reveals a similar trend seen with the longer cousins. The LED bulbs meant to replace the CFL comes in at about half the power consumption and slightly lower total amount of light. I'll be checking if the reality reflects these numbers, of course.
Continue reading "Now switching light bulbs to LED"

Switching home lighting from FPL to LED

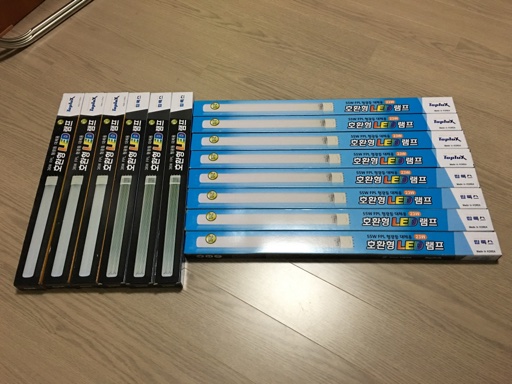
Fluorescent light replacement LED lamps from TopLux - 14 in all

Having a smart meter giving real-time power consumption data provided a lot of insights for my home. The baseline load when everything is idle is about 80W, and the refrigerator running at full power adds 90W to that. So when I noticed that more than 300W were being used during the evening hours even with the TV turned off, I had to track down what the culprit was.

It turned out that the sole reason for this uptick was the lighting. Fluorescent lights in the living room and the study room were turned on for several hours every day and contributing much to the total consumption. Knowing that LED lights were more efficient and that the price has come down a lot recently, I decided to make some major investment.

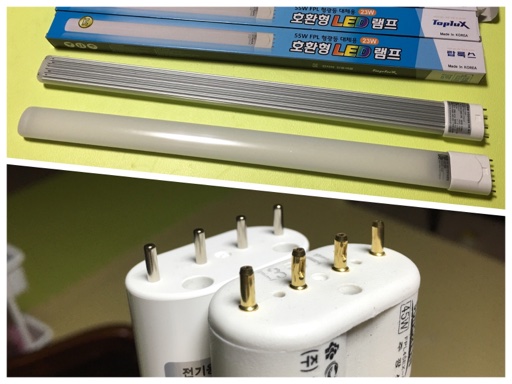
Front and back of the LED lamp / comparison of the connector (back: LED / front: FPL)

As with a lot of apartments in Korea, the typical type of lighting installed was PL compact fluorescent lights, or FPL for short. It uses 4-pin 2G11 socket and has external ballast. Lots of replacement methods exist - lamp-only, ballast + lamp (socket is kept), or total replacement. As the lamp-only method is simplest by far and not much more expensive than replacing everything, the choice was obvious for me. I ordered the relevant LED lamps manufactured and sold by TopLux of Korea which were on sale - 23W version cost about KRW 21,000 (US$17.50) and 15W one, KRW 14,000 (US$11.70). Here is how they stack up with the existing FPL lamps.

Name Type Len. (mm) Power (W) Lum.Flux (lm)
Hyosun FPL45EX-D FPL 540 45 4060
TopLux FT23-57 LED 535 23 3400
Hyosun FPL32EX-D FPL 415 32 2600
TopLux FT18W-04-57A LED 415 15 2250

According to the specifications, the LED lamp consumes about half the power while putting out about 85% of total light, or luminous flux, compared to the similarly sized FPL counterpart. This is indeed quite an increase in efficiency if it delivers. Visually, one side of the lamp is taken up by a long heat sink and uses the same four-pin layout. The pins themselves are simply round, not dimpled in the middle like the FPL it's replacing, so I suppose it won't "hook in" quite as well.
Continue reading "Switching home lighting from FPL to LED"

Seojun Smart Meter Review

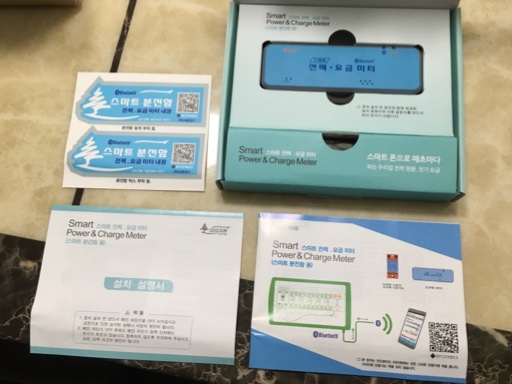
Contents of the Seojun Smart Power & Charge Meter package:
stickers, smart meter, installation guide, and user manual

My home isn't particularly wasteful when it comes to electricity spending - it rarely exceeds 200kWh per month except for hot summer months. Still, I wanted to see the real-time usage to make further optimizations. After browsing through myriads of metering solutions, both domestic and abroad, I settled on a particular product sold by Seojun Electric.

Officially called "Smart Power & Charge Meter" model SJPM-B70 (I'll simply refer to it as "smart meter" hereafter), it connects to the main power line going through the primary circuit breaker inside the house. Once installed, it constantly measures and stores the power consumption data. This can then be accessed in real time by a smartphone via Bluetooth technology.

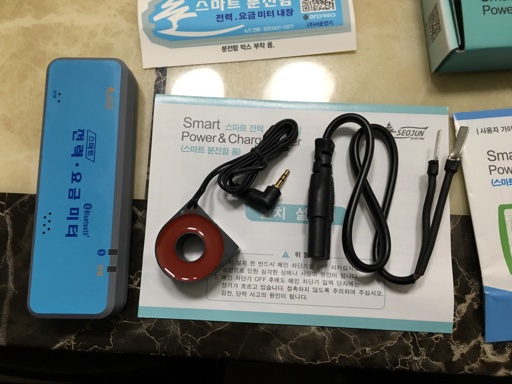
Current sensor and the power plug for the meter

The main thing going for this product is its cost and simplicity. It only costs KRW 42,000 (US$35) online, not much more than the power monitors you plug into an outlet. And you merely need to hook the sensor and the power plug into the right place to get it working - no further maintenance required. Instructions on how to do that are shown with diagrams in the included guide.

You also don't need to sign up for anything as the data stays in your house, fully under your control. As I don't need to have my consumption data shared and analyzed over the internet cloud, this was actually a plus for me. And in case you wanted to show that you have this smart meter installed, the package provides two blue stickers to let you do just that.
Continue reading "Seojun Smart Meter Review"

Copyright (C) 1996-2024 Woo-Duk Chung (Wesley Woo-Duk Hwang-Chung). All rights reserved.